
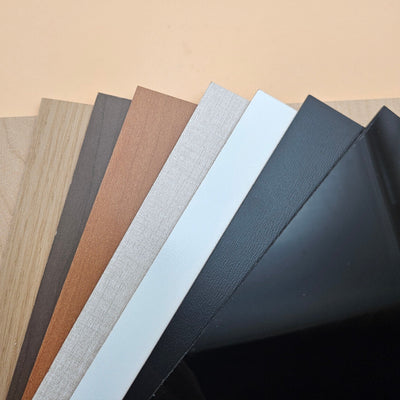


Leatherette laser settings cheat sheet by thickness and colour
Updated Oct 2026TL;DR: Leatherette settings depend on three things: thickness and backing (0.8 mm felt, 1.2 or 1.8 mm foam), what the sheet engraves to (black, gold, silver, copper or white), and whether it carries the heat-activated adhesive. Engrave light and fast so you remove only the colour face. Cut slow enough to clear the backing. The ranges below are brackets to test across, not recipes. Run our free 100 x 70 mm test card on an offcut once per sheet type and you will have your own settings in ten minutes.
How to use this cheat sheet
No two lasers deliver the same energy at the same numbers. Tube age, lens, focus, air assist and even how the software rounds speed all shift the result. A single "40 percent at 20 mm/s" recipe copied from someone else's machine is a guess.
So this page gives you two things instead:
- Test brackets. For each thickness and finish, a power and speed range wide enough to contain the right answer on most 40 to 60 W CO2 lasers and 10 to 20 W diodes.
- A test card. A free SVG that runs 16 engrave settings and 4 cut settings on one small offcut, so you find the right answer inside that bracket on your own machine.
Run the card once for each combination you sell: thickness, finish family and adhesive option. Write the winning settings on the back of the card and keep the cards in a box by the laser.
What the laser is actually removing
Laserable leatherette is built in layers. A thin colour face sits on top of a contrast layer, which is the colour printed in the product name: "Engraves Black", "Engraves Gold", "Engraves Silver" and so on. Under that is the backing, felt on our 0.8 mm sheets and grey foam on 1.2 mm and up. Sheets ordered with the "With Adhesive" option add a layer of heat-activated TPU adhesive on the back.

An engrave has one job: remove the colour face and stop. A cut has the opposite job: go through every layer, adhesive included. That is why engrave settings are light and fast, and cut settings are slow and heavy, on the same sheet.

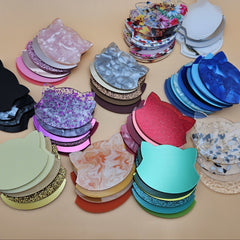
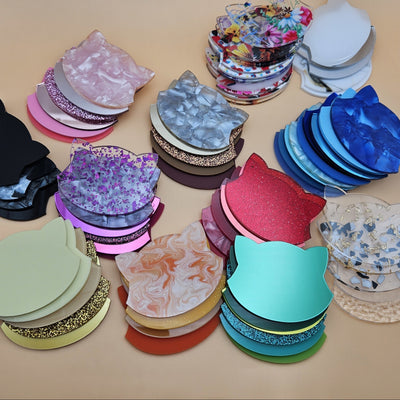
The cats above are cut from our "Engraves Black" range. Every colour reveals the same black contrast layer, but the face colours do not all need the same power to clear. That difference is why one test per finish family pays off.
Cut test brackets by thickness
These are brackets to test across, not settings to run blind. Start in the middle of the range, run the test card, and move toward whichever end gives a clean drop-out with the lightest edge.
| Sheet | Backing | CO2, 40 to 60 W | Diode, 10 to 20 W optical | Notes |
|---|---|---|---|---|
| 0.8 mm | Soft felt | 15 to 40 mm/s, 20 to 45 % power, 1 pass | 3 to 8 mm/s, 100 %, 1 to 2 passes | The everyday thickness for patches, tags and bookmarks. Felt fibres are what hold a part in when the cut is borderline. |
| 1.2 mm | Grey foam | 10 to 25 mm/s, 30 to 55 %, 1 pass | 2 to 5 mm/s, 100 %, 2 to 3 passes | Foam beads up on the edge if the cut is too slow. Prefer more power over a slower speed. |
| 1.8 mm | Grey foam | 6 to 15 mm/s, 40 to 70 %, or 2 passes at a faster speed | Slow and multi-pass. Test before you plan a product on it. | Two moderate passes usually leave a cleaner edge than one very slow pass. |
| Dual-sided 1.8 mm | Two finished faces | Start from the 1.8 mm row | As 1.8 mm | Put the face that matters most up. The laser side always has the crisper edge. |
| Any thickness, "With Adhesive" | Adds TPU | Expect roughly 10 to 20 % more energy than the same sheet without adhesive | Add a pass | Melted TPU can re-weld the kerf. Let parts cool before weeding. |
Diode lasers are rated in two ways. A "40 W" diode machine is often 5 to 10 W of optical output. The brackets above use optical watts, the number that actually reaches the sheet. Diode light is also absorbed less by pale faces, so white and pastel colours can need noticeably more energy than dark ones.
Engrave test brackets by finish
On a 40 to 60 W CO2, most of our leatherette engraves cleanly somewhere between 250 and 500 mm/s at 8 to 25 percent power. On a 10 to 20 W diode, start around 100 to 300 mm/s at 15 to 50 percent. What changes between finishes is where in that window you land, and what a bad result looks like.
| Finish family | Examples in our range | Engrave goal | Start at | Watch for |
|---|---|---|---|---|
| Colour face, engraves black | Bright colours, matte vintage, cork | Clear the colour, reveal even black | Low end of the power range, fast | A brown halo around letters means too much energy |
| Dark face, engraves metallic | Black engraves gold, silver or copper; blue engraves gold (engraves in metallic) | Expose bright, unbroken metallic | Low to middle | Too little leaves dark specks in the metallic; too much dulls it toward brown |
| Metallic face, engraves black | Gold, copper, brushed gold, brushed copper (metallic) | Remove the metallic film completely | Middle of the range | Reflective faces can need a little more power than plain colours |
| Textured faces | Carbon fiber, denim, basketball, golf | An even fill over the high and low spots | Middle, or two light passes | Patchy fill in the recesses of embossed textures |
| Glossy and holographic | Glossy, holographic | Clean matte mark against the shine | Low end, then step up | Melting or a raised, shiny ridge at the edge of the engrave |
| Light face, engraves dark | White and pastel faces | Crisp dark detail, ideal for small text | Low end | Smoke staining on the face. Wipe it off after the job |
Two general rules apply across every family:
- Engrave before you cut. If the part is cut free first, air assist can shift it before the engrave runs.
- Small text wants a slightly lower power and a finer line interval (higher DPI). Large filled areas tolerate a coarser interval and run faster.
How to scale settings to your wattage
Settings move between machines through one idea: energy per millimetre of travel.
Energy per mm = laser watts x power percent / speed.
If a result works at 40 percent and 20 mm/s on a 40 W tube, that is 16 W delivered at 20 mm/s. On a 60 W tube, you get the same 16 W at about 27 percent, or you can keep 40 percent and run at about 30 mm/s.
Treat the converted number as the centre of your next test, not as the answer. Three things break the simple maths:
- CO2 tubes are unstable at very low power. Below roughly 10 to 15 percent, many tubes fire inconsistently. On a big tube, raise the speed instead of dropping power further.
- Spot size changes with the lens. A longer focal-length lens spreads the same energy over a wider line.
- Machines do not always reach the speed you type. On short engrave strokes, the head may never hit 500 mm/s before it has to turn around. Your effective speed is lower, and the engrave is deeper than the numbers suggest.
The free leatherette test card
Download the test card: leatherette-test-grid.svg (100 x 70 mm). Right-click and save. Free to use and share.


Every square on the card is a different colour, so it imports as its own layer in LightBurn, xTool Creative Space and most other laser software. That lets you give each square its own power and speed.
| Element | Colours | What to set |
|---|---|---|
| Engrave squares, row 1 |
#000000, #00E000, #D0D000, #00E0E0
|
Lowest power, speed from fastest (left) to slowest (right) |
| Engrave squares, row 2 |
#FF00FF, #B4B4B4, #0000A0, #00A000
|
Second power step, same four speeds |
| Engrave squares, row 3 |
#A0A000, #00A0FF, #A000A0, #808080
|
Third power step, same four speeds |
| Engrave squares, row 4 |
#7D87B9, #BB7784, #4A6FE3, #8CD78C
|
Highest power, same four speeds |
| Cut squares 1 to 4 |
#FF0000, #A00000, #FF8000, #D33F6A
|
Four cut settings, gentlest at the top |
| Index numbers | #0000FF |
Line mode, low power, just enough to read |
| Card outline | #C08000 |
Your best guess cut setting. Runs last |
If you use LightBurn, its built-in Material Test tool builds a similar grid automatically. The card is still handy when you want the same layout on every material so the results are easy to compare side by side.
How to run the test, step by step
Step 1: Cut an offcut from the exact sheet you will use. Same colour, same thickness, same adhesive option. A sheet with TPU adhesive cuts differently from the same colour without it. You need a piece at least 110 x 80 mm.
Step 2: Lay it flat, face up, and focus on the face. Leatherette with a foam back can bow slightly. Weight the corners or use pins at the edges, outside the card area. Focus on the top surface, not the bed.
Step 3: Import the card and set the layers. Pick four speeds and four powers that span the bracket for your finish from the tables above. Set the four cut squares across the cut bracket for your thickness. Order the job so engraves run first, then the numbers, then the cut squares, then the outline.
Step 4: Run it with your normal air assist and extraction. Use the same air assist setting you will use in production. Air assist changes both char and cut quality, so a test without it does not transfer.
Step 5: Read the results in daylight. Pick the engrave square with full, even contrast and no brown halo. Then pick the gentlest cut square that drops out cleanly with no felt or foam fibres holding it. Check the back of the cut squares too.
Step 6: Write it down. Write the winning settings on the back of the card with a fine marker, along with the date and your machine. If you are happy to share, add it to our community laser settings database so other laser crafters on the same machine start closer to the answer.

Symptoms and fixes
| What you see | Likely cause | What to change |
|---|---|---|
| Brown halo or scorched edge around an engrave | Too much energy, or air assist off | Raise speed or lower power; check air assist is on |
| Specks of face colour left inside the engrave | Too little energy, or a textured face | Small power increase, finer line interval, or a second light pass |
| Engrave went through to the felt or foam | Far too much energy | Drop power substantially and re-test from the low end |
| Cut part will not drop out, fibres hold it | Cut is borderline through the backing | Slow the cut by about 10 percent, re-check focus, make sure the sheet is flat |
| Kerf looks closed again after cutting | TPU adhesive re-welded the cut | A touch more air assist, a little more power at a slightly higher speed, weed once cool |
| Dark, sooty cut edges on light colours | Cut too slow, or smoke settling on the face | More air assist, more power at a higher speed, wipe the face after cutting |
| Small parts flip or move mid-job | Air assist too strong for light parts | Lower air pressure for small parts, add tabs, pin the sheet edges |
| Marks on the back of the sheet | Reflection off the honeycomb | Raise the sheet on pins, clean the bed, avoid excess cut power |
Weeding, cleanup and fumes
Let cut parts cool for a minute before you lift them. Warm PU and TPU are softer and tear more easily. For designs with small interior pieces, lift the waste with a weeding hook from the outside in, and push stubborn centres out from the back rather than pulling them from the face.
Smoke residue on the face of light colours usually comes off with a slightly damp microfibre cloth. If you want to try isopropyl alcohol, test it on an offcut first, because solvents can dull some glossy and metallic finishes.
Every material you laser produces fumes, leatherette included. Run your extraction or vent the machine outside for every job, not just the smoky ones. Our leatherette is PU, which is laser-safe. PVC-based faux leather is not, and should never go in a laser. Our PU vs PVC guide explains how to tell them apart.
Frequently asked questions
Q: What are the best laser settings for leatherette? A: There is no single best setting, because every machine delivers energy differently. As a starting bracket on a 40 to 60 W CO2, engrave at 250 to 500 mm/s with 8 to 25 percent power, and cut 0.8 mm at 15 to 40 mm/s with 20 to 45 percent. Run a test grid on an offcut to find the exact values for your machine.
Q: Can a diode laser cut leatherette? A: Yes. A 10 to 20 W optical diode cuts our 0.8 mm leatherette in one or two slow passes and 1.2 mm in two or three. Pale colours absorb diode light less well than dark colours, so expect to need more energy on white and pastel faces.
Q: Does the adhesive version need different settings? A: Engrave settings stay about the same because the engrave never reaches the back. Cut settings need roughly 10 to 20 percent more energy to get through the TPU adhesive layer, and parts should cool before weeding so the adhesive does not re-weld the kerf.
Q: Why does my engrave have a brown ring around it? A: Too much energy is reaching the area around the engrave. Raise the speed or lower the power, and make sure air assist is on. Over-engraving also burns through the contrast layer, which shows as brown instead of the clean contrast colour.
Q: Should I cut leatherette face up or face down? A: Face up. The laser side gives the crispest edge and the engrave has to be on the face anyway. Face down only makes sense for dual-sided sheets when the back face matters more.
Q: How do I convert settings from a 40 W laser to a 60 W laser? A: Keep the energy per millimetre constant: watts times power percent divided by speed. 40 percent at 20 mm/s on 40 W is roughly 27 percent at 20 mm/s on 60 W, or 40 percent at 30 mm/s. Use the converted value as the middle of a new test, not as a final setting.
Q: Do I need to test every colour? A: Test once per finish family, thickness and adhesive option. Colours within one family usually land close together. Test again when you open a new shipment if a result looks off.