


Mirror, glitter and coloured acrylic: what changes when you laser them
Updated Oct 2026TL;DR: Speciality acrylic cuts much like plain cast acrylic on a CO2 laser, but each type changes one thing. Mirror acrylic has its reflective layer behind the plastic, so engraving the front frosts the surface while engraving the painted back opens a clear window. Glitter acrylic cuts cleanly but shows sparkle in the edge. Opaque colours, transparent colours and dual-finish sheets mostly differ in how they look and in whether a diode laser can cut them at all.
Why speciality acrylic needs its own rules
Every sheet in this guide is still acrylic (PMMA). A CO2 laser at 10.6 micrometres is absorbed by the plastic itself, so the colour, the glitter or the mirror coating barely changes how it cuts. What changes is what you see afterwards: which face shows, how the edge looks, and what an engraving does to the layers.
Diode lasers are a different story. A blue diode laser (around 445 to 455 nm) relies on the pigment to absorb its light. Clear and transparent acrylic let that light pass straight through, and a mirror layer bounces it back. So with a diode, the type of acrylic decides whether the job works at all.
Mirror acrylic
Our mirror acrylic comes in 30 x 48 cm (about 12 x 19") sheets. Gold and silver are 3 mm; the coloured mirrors, black mirror and the 2-way see-through mirror are 2.6 mm. Some colours are cast and some are extruded, and each listing says which.
How it is built. Mirror acrylic is a second-surface mirror. You look through a clear or tinted acrylic face at a thin reflective layer on the back, and that layer is protected by a painted backing. The painted side is the back of the piece. It is not meant to be seen.

Engraving the front face. With the mirror face up, a light engraving pass frosts the acrylic surface. The mirror behind it is untouched, so the design reads as a frosted white mark floating over the reflection. Keep it light. You are only texturing the surface, not digging into the sheet.
Engraving the painted back. Flip the sheet so the paint faces the laser and mirror your artwork horizontally in your software. The laser removes the paint and the reflective layer together, leaving clear acrylic. From the front, the design looks like a window cut into the mirror. Whatever sits behind it shows through: a coloured layer, glitter, a photo, or an LED for a lit piece.
Cutting. Cut with the film on the mirror face. Most laser crafters cut mirror face up because it is easier to line up the artwork and the film protects the face from smoke residue. For back-engraving jobs, cut in the same flipped position so the engraving and the cut line up.

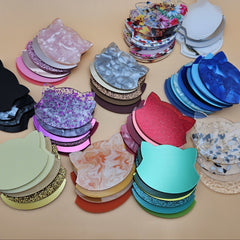
Mirror as a layer. Mirror acrylic is at its best as the top layer of a stacked piece. The ornaments below use a mirror layer for the name and frame over a contrasting base.


Both pieces were designed with free generators on MyLaserTools: the Christmas Ornament Generator and the Snowman Ornament Generator. The ornament generator offers single, two-layer and three-layer designs with each layer in its own colour in the SVG, so you can cut the mirror layer and the base from different sheets.
Handling. The mirror face scratches more easily than it looks, and scratches show in a reflection. Keep the film on until the piece is assembled. Glue to the painted back with an adhesive that will not attack the paint: double-sided tape or a thin layer of epoxy is safer than solvent cement on that face. See best glues for acrylic.
Glitter acrylic
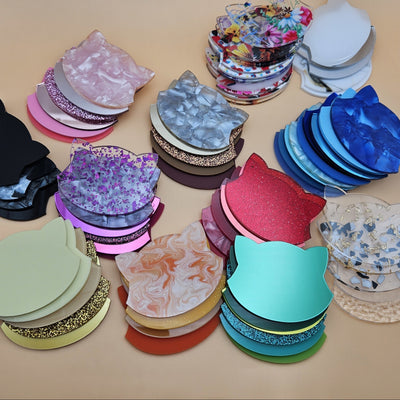
Our glitter acrylic is cast, 3 mm (about 1/8"), glossy on both faces, with PE film on both sides. The glitter is suspended through the sheet, not printed on top.
Cutting. Glitter acrylic cuts like other 3 mm cast acrylic on a CO2 laser. Start from your normal 3 mm settings and run a test, since dense or metallic glitter can need a touch more energy. The edge comes out glossy, but the glitter particles show in it, so it sparkles rather than looking glass-clear. That is usually a feature on ornaments and keychains.

Engraving. Engraving glitter acrylic frosts the surface like any cast sheet, but the glitter breaks up the frosted area, so fine text loses contrast. Glitter works better as a cut layer than as an engraving surface. Put the name or detail on a solid or mirror layer above it.

Diode lasers. Opaque glitter colours can cut on a diode, transparent glitter generally cannot. Our Opaque Gold and Black glitter sheets are in the Diode Laser Tested collection. One community entry in our laser settings database cuts glitter acrylic on a 10 W xTool diode at full power, speed 4, two passes. Treat that as a starting point for your own test, not a guaranteed recipe.

Opaque, transparent and dual-finish colours
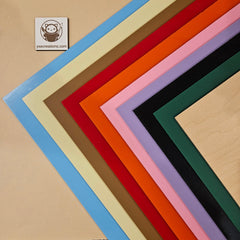
Opaque solid colours. Solid colour acrylic blocks light completely. On a CO2 laser it cuts and engraves like any cast sheet. Engraving gives a frosted mark that is lighter than the surface: strong contrast on dark colours, subtle on pale ones.
Transparent coloured acrylic. Clear coloured acrylic is cast, glossy on both faces and lets light through. It is the material for suncatchers, edge-lit signs and layered pieces where light passes through several colours. Engraving shows up well because the frosted area catches light.
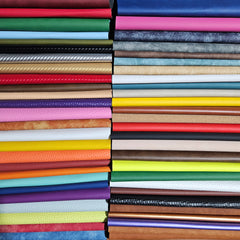
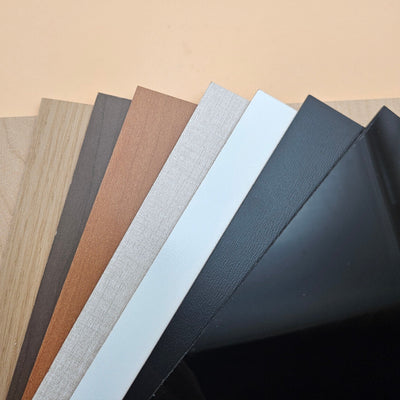
Dual-finish acrylic. Our dual-finish sheets are opaque cast acrylic with one glossy face and one frosted (matte) face. Pick the face to show before you cut: matte hides fingerprints and reads modern, glossy reads bright and bold. Engraving on the matte face gives less contrast than on the glossy face, because the surface is already frosted.

Which types a diode laser can cut
A diode laser only cuts acrylic that absorbs blue light. As a rule of thumb:
| Acrylic type | Diode cutting | Why |
|---|---|---|
| Clear | No | Blue light passes through the sheet |
| Transparent colours | Unreliable, mostly no | Too little pigment to absorb the beam |
| Opaque dark and saturated colours | Yes, with a test | Pigment absorbs the beam |
| Opaque white and pale colours | Yes, with more passes | Pale pigment reflects more of the beam; a 20 W diode cut white-core two-tone in 4 passes |
| Opaque glitter | Yes, with a test | Base colour does the absorbing |
| Mirror | Not recommended | Beam passes the acrylic and reflects off the mirror layer |
Our Diode Laser Tested collection lists the acrylic we have confirmed on a diode, including several dual-finish colours. For our own diode test results, see cutting acrylic with a diode laser and the CO2 vs diode vs fiber guide.
A diode beam reflected off mirror acrylic is still a laser beam. Part of it can bounce straight back up into the laser head, where back-reflection can damage the lens or the diode module itself, and the rest scatters around the enclosure. Never point a diode at a mirror face, check your machine's manual on reflective materials, keep the enclosure closed and wear safety glasses rated for your laser's wavelength. On a CO2 laser, engrave mirror from the painted back where you can.
Settings starting points
Speciality acrylic starts from the same settings as plain cast acrylic of the same thickness. Two adjustments are worth making:
- 2.6 mm mirror is thinner than 3 mm, so it needs a little less energy. A community entry for a 40 W Glowforge cuts 2.6 mm mirror at full power, speed 155, one pass.
- Glitter sometimes needs slightly more energy than a solid sheet of the same thickness. Test before you commit a full sheet.
Run a small test cut on an offcut every time you open a new colour. Pigments and coatings vary, and a two-minute test is cheaper than a ruined sheet.
Frequently asked questions
Q: Which side of mirror acrylic should face up when I cut it? A: Mirror face up, with the film on, for most jobs. It is easier to align and the film protects the face. Flip it only when you want to engrave the painted back.
Q: Can I engrave mirror acrylic? A: Yes. Engrave the front face lightly for a frosted design over the mirror, or engrave the painted back to remove the paint and mirror and create a clear window. Mirror your artwork for back engraving.
Q: Is mirror acrylic cast or extruded? A: It depends on the colour. Each mirror listing in our store states whether that sheet is cast or extruded.
Q: Can a diode laser cut mirror acrylic? A: We do not recommend it. The blue beam passes through the acrylic and reflects off the mirror layer instead of cutting.
Q: Why does my glitter acrylic edge sparkle instead of looking clear? A: The glitter runs through the whole sheet, so it shows in the cut edge. That is normal and part of the look.
Q: Can I engrave on glitter acrylic? A: You can, but the glitter breaks up the frosted mark and fine text loses contrast. Use glitter as a cut layer and put text on a solid or mirror layer.
Q: What is dual-finish acrylic? A: Opaque cast acrylic with one glossy face and one matte face, so one sheet gives you two looks. Pick the face to show before you cut.