
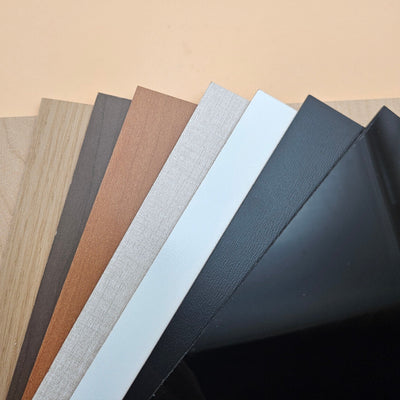


Engraving two-tone acrylic on a diode laser
Updated Oct 2026TL;DR: A blue diode laser can engrave many two-tone acrylic colours. On a 20 W xTool S1, our 1.5 mm brushed gold two-tone engraved cleanly at 500 mm/s and 50% power and cut at 10 mm/s and 90%. Green engraved at 200 mm/s and 40%, and cut in four passes at 8 mm/s. White engraves red and white engraves blue have been engraved and cut on a 10 W diode. 3 mm is harder on lower-power machines. Run a test card on every new colour.
Why this guide exists
Our two-tone and three-tone engravable acrylic is made for CO2 lasers, and the product listings say so. A CO2 laser works at 10,600 nm, a wavelength every acrylic absorbs, whatever its colour. A diode laser works at around 445 to 455 nm, visible blue light, and whether the material absorbs that light depends on its colour.
That is why our two-tone sheets are not in our Diode Laser Tested collection. They can work on a diode, and many laser crafters use them that way, but results vary by colourway. This guide shares real diode results from laser crafters who use our sheets, explains which colours to try first and shows how to test before you commit a whole sheet.
If you are new to two-tone, start with Two-tone acrylic: the complete guide, which explains caps, cores and engrave depth.
Real results: a 20 W diode on 1.5 mm two-tone
A laser crafter who works with our sheets ran full test cards on an xTool S1 20 W diode laser and shared the results with us. Both sheets were 1.5 mm two-tone: a brushed gold that engraves black, and a green that engraves white. Every setting below is from their cards, on their machine.
| Sheet (1.5 mm) | Job | Setting that worked best | Notes |
|---|---|---|---|
| Brushed gold, engraves black | Engrave, fast and clean | 500 mm/s, 50% power, 1 pass | Their pick for everyday text and logos |
| Brushed gold, engraves black | Engrave, deeper | 200 mm/s, 50% power, 1 pass | A deeper, darker mark |
| Brushed gold, engraves black | Cut | 10 mm/s, 90% power, 1 pass | Clean cut through the black core |
| Green, engraves white | Engrave | 200 mm/s, 40% power, 120 lines per cm, 1 pass | The cleanest square on their card; used for a finished sign |
| Green, engraves white | Cut | 8 mm/s, 100% power, 4 passes | Cleanest edge, no overheating |
| Green, engraves white | Cut, single pass | 3 mm/s, 100% power, 1 pass | Cuts through in one pass, with some overheating around the cut |
120 lines per cm is a line interval of about 0.083 mm, or roughly 300 DPI.

xTool S1 20 W diode: engrave 150 to 300 mm/s, cut 3 to 5 mm/s.
The first gold card covers the slow end: engraving from 150 to 300 mm/s at 30 to 60% power, and cutting from 3 to 5 mm/s at 90 and 100%. Every engrave square came out clean and every cut went through. The second card pushed engraving from 350 to 600 mm/s and cutting up to 10 mm/s, and still every square engraved and every X cut out.

xTool S1 20 W diode: engrave 350 to 600 mm/s, cut 6 to 10 mm/s.
On the green sheet, the engrave grid ran 200 to 300 mm/s at 40 to 60% power. All nine squares revealed a clean white core; 200 mm/s at 40% was the cleanest.

xTool S1 20 W diode: green two-tone, engrave 200 to 300 mm/s at 40 to 60% power.
For cutting the green sheet, they ran six circles, trading speed against passes: 3 mm/s with 1 pass, 4 mm/s with 2 passes, 5 mm/s with 2 passes, 6 mm/s with 3 passes, 7 mm/s with 3 passes and 8 mm/s with 4 passes, all at 100% power. All six cut through. The slowest single pass overheated the acrylic. More, faster passes at 8 mm/s gave the cleanest result, and that is what they used to cut their finished circles.

xTool S1 20 W diode, cut test: green two-tone, 3 to 8 mm/s at 100% power, 1 to 4 passes.
Two things to take from this. First, a 20 W diode handles 1.5 mm two-tone well, including a metallic cap and a white core, both of which the colour theory below flags as risky. Second, these numbers are a starting point for an xTool S1 20 W, not a recipe for every diode. A 5 or 10 W diode delivers far less energy and needs slower speeds, more passes, or score and snap instead of cutting. Run your own card before a real job.
Why cap colour decides the result
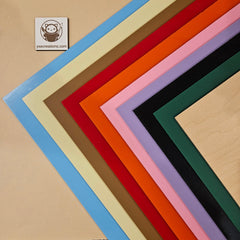
A coloured surface looks the colour it does because of the light it reflects. A blue cap looks blue because it reflects blue light. Point a blue diode beam at it and more of the beam bounces off, so it needs more energy to engrave. A yellow or orange cap looks warm because it absorbs blue light, so the same beam gets absorbed and turns into heat.
The diagram sorts the two-tone cap colours by how they are likely to behave under a diode. It is based on how pigments absorb blue light, not on measurements, so treat it as a list of what to test first. Where we have real results, they win: the brushed gold and green tests above both engraved cleanly on a 20 W diode.

In short:
- Likely to engrave well: matte black, dark brown, the dark wood grains, red, orange, yellow, deep yellow.
- Test carefully: dark green, green, purple, rose pink. Some absorb enough, some need slow speeds and leave a patchy floor. Green engraved cleanly on a 20 W diode in the test above.
- Varies by finish: brushed and metallic caps (chrome, stainless steel, silver, gold, copper). The reflective layer can bounce some of the beam. Brushed gold engraved cleanly on a 20 W diode across a wide range of settings; we have no diode results yet for chrome, silver or copper, so test those first.
- Engraves with tuning: white, light grey, light oak, blue, light blue, teal. These reflect the most blue light, so they need more power, a slower pass or extra passes. In practice, white engraves red and white engraves blue have been engraved and cut on a 10 W diode, so a test card is worth running before you rule a colour out.
Why the core matters when you cut
Once the cap is gone, the beam meets the core. For engraving that is fine: you stop as soon as the core shows. For cutting, the beam has to go through the core, so the core colour decides whether a diode cuts the sheet at all.
The core is always the colour the sheet engraves to. A sheet sold as "engraves white" has a white core, which reflects more blue light than a dark one. On a 20 W diode that means more passes, not failure: the green, white-core sheet above cut cleanly in four passes at 8 mm/s, while the black-core gold cut in a single pass at 10 mm/s. On lower-power diodes, white cores are where cutting gets slow or stalls.
Thickness matters as much as colour. Every result in this guide is on 1.5 mm. 3 mm is twice the material to cut through and is a challenge for lower-power lasers. Our two-tone sheets are more opaque than the regular cast acrylic we stock, so they absorb a diode beam better than clear or translucent sheet, but expect slow, multi-pass cuts on 3 mm and run a test line first.
This matches our earlier diode tests on solid colour cast acrylic: black cut in one pass with an edge close to a CO2 cut, most other colours needed two passes and left a rough edge, blue was borderline and clear does not cut at all. You can read the full results in Material testing: cutting acrylic with a diode laser.
| Sheet | Cap (engraving) | Core (cutting) | Overall on a diode |
|---|---|---|---|
| Black, engraves yellow | Likely good | Yellow, moderate | Good first test |
| Dark brown, engraves yellow | Likely good | Yellow, moderate | Good first test |
| Red, engraves black | Likely good | Black, likely good | Good first test |
| Yellow, engraves black | Likely good | Black, likely good | Good first test |
| Brushed gold, engraves black | Tested clean on 20 W | Black, cut in 1 pass at 10 mm/s on 20 W | Proven on a 20 W diode |
| Green, engraves white | Tested clean on 20 W | White, cut in 4 passes at 8 mm/s on 20 W | Proven on a 20 W diode |
| Matte black, engraves white | Likely good | White, needs extra passes | Good on 20 W; on lower power, engrave and score and snap |
| Dark wood grains, engrave white | Likely good | White, needs extra passes | Good on 20 W; on lower power, engrave and score and snap |
| White, engraves red or blue | Engraved on a 10 W diode | Red or blue, cut on a 10 W diode | Proven on a 10 W diode; test your settings |
| White or light grey, engraves black | Needs more energy | Black, likely good | Test with more power |
| Brushed chrome, silver or copper, engraves black | Not tested yet | Black, likely good | Test first |
| Blue or light blue, engraves white | Needs more energy | White, needs extra passes | Test with more power |
There is a trade-off in the range. Most sheets with a dark, diode-friendly cap engrave to a white core, and most sheets with a black core have a light or metallic cap. On a 20 W diode both kinds work with the right number of passes. On a lower-power diode, the sheets where both layers absorb blue light are the safest first buys.
Engrave on the diode, score and snap the shape
For rectangular pieces such as name badges, labels, door signs and luggage tags, you do not need the diode to cut at all.
- Engrave a row of designs on the sheet, with a small gap between them.
- Score between the designs with a utility knife and a metal ruler, and snap each piece off over a table edge.
- Smooth the edges with fine sandpaper.
The method is in How to cut acrylic without a laser: score and snap. It works on 1.5 mm and 3 mm, and on a lower-power diode it is often faster than many slow passes through a white core.
For shapes with curves, such as keychains and ornaments, cut on the diode. A 20 W diode cut 1.5 mm two-tone cleanly in the tests above. On a lower-power diode, test a cut on a 1.5 mm sheet with a dark core first; thin sheets with dark cores give a diode the best chance.
What you need
- A diode laser with air assist. Air assist keeps the engraving cleaner and reduces flare-ups when cutting.
- Safety glasses rated for your laser's wavelength, usually 445 to 455 nm, with a suitable optical density. Glasses made for CO2 lasers do not protect against a blue diode beam.
- Fume extraction or ventilation. Every laser process makes fumes and fine particles, whatever the material. Vent outside or use a filter rated for laser fumes.
- A scrap strip of the colour you plan to use, at least 3 x 4". The offcut from a score and snap works well.
- Hold-downs: pins, magnets or tape to keep the sheet flat.
Step by step: run a test card
Step 1: Prepare the strip.
Peel the protective film off the face of your scrap strip. Lay it flat on the bed and hold it down at the corners. A strip that bows will be out of focus in the middle.
Step 2: Focus on the surface.
Set focus on the top of the acrylic using your machine's focus tool or autofocus. Diode beams have a short sweet spot; a millimetre off focus makes the spot bigger and the engrave weaker.
Step 3: Build a power and speed grid.
Use your software's test tool rather than drawing squares by hand:
- LightBurn: Laser Tools, then Material Test. Set power across one axis and speed down the other, with a small fill square in each cell.
- xTool Creative Space: use the material test array to generate the same kind of grid.
A 5 x 4 grid of small squares fits on a 3 x 4" strip. Start the power range at about a third of the power you use to engrave wood, and end at your full wood engrave power. Start the speed at your usual engrave speed and go up to about twice that. Add a line of text with the sheet name so the card is labelled.
Step 4: Run the grid with the lid closed and extraction on.
Watch through the shield, not the open lid. Metallic caps in particular can reflect the beam in unexpected directions.
Reflective surfaces and your laser head: shiny and metallic surfaces can bounce part of the beam straight back up into the laser head. Back-reflection can damage the lens or the diode module itself, and some manufacturers warn against engraving reflective materials. Keep the focus on the surface, never engrave a true mirror face with a diode, and check your machine's manual before running metallic caps. Brushed two-tone caps worked in the tests above, but if you see bright flashes or the beam visibly reflecting, stop the job.
Step 5: Read the card.

Each square falls into one of four groups:
- Nothing: the cap is untouched. Not enough energy.
- Patchy: some cap is left. Close, but not there.
- Clean core: the cap is gone and the floor is even. This is what you want.
- Over-burned: melted, glossy or hazy floor, sometimes with a raised edge.
Pick a square in the middle of the clean band, not at its edge. The power and focus of a diode drift slightly across the bed, and a setting from the middle of the band still lands clean when conditions change a little. Write the settings on the back of the card and keep it with the sheet.
If the whole card is "nothing" or "patchy" even at full power and slow speed, that colour is not a good match for your diode. Switch to a colour from the "likely to engrave well" list.
Step 6: Engrave the real piece.
Use the setting from the card. Engrave first and cut last, so the piece cannot shift between operations.
Step 7: Cut, or score and snap.
If you are cutting on the diode, test a short cut line on the strip first. Use multiple faster passes rather than one very slow pass, and keep air assist on: in the green test above, one pass at 3 mm/s overheated the acrylic, while four passes at 8 mm/s left the cleanest edge. If the cut is still not through after several passes, switch to score and snap for straight-edged pieces.
Step 8: Clean up.
Wipe the engraving with a soft cloth, water and a drop of dish soap. Avoid alcohol and solvent cleaners, which can craze acrylic.
Troubleshooting on a diode
| What you see | Likely cause | Fix |
|---|---|---|
| No mark at all | Cap reflects the beam (white, blue, some metallics), or focus is off | Re-focus, slow down and add power; if there is still no mark, switch to a dark or warm cap colour |
| Faint, patchy mark that never cleans up | Cap partly reflective, or out of focus | Re-focus on the surface; slow down; if it still will not clear, change colour |
| Clean on one side, patchy on the other | Sheet bowing or bed not level | Hold the sheet flat at the corners and middle |
| Melted letters, raised edges | Too slow or too much power | Move one or two cells toward "fast, low power" on your card |
| Cut stops partway, edges melted | Light core reflecting the beam, heat building up | Use more passes with air assist, or score and snap instead |
| Brown staining around the engraving | Smoke residue | Wipe with soapy water; check extraction |
Frequently asked questions
Q: Can a diode laser engrave two-tone acrylic? A: Often, yes, but it depends on the cap colour. On an xTool S1 20 W, our 1.5 mm brushed gold two-tone engraved at 500 mm/s and 50% power, and green at 200 mm/s and 40%. White engraves red and white engraves blue have been engraved and cut on a 10 W diode. Dark and warm caps absorb a blue beam most easily; white, light grey and blue caps reflect more of it and need testing. Test each new colour on a scrap first.
Q: What are good diode settings for 1.5 mm two-tone acrylic? A: On an xTool S1 20 W, the test cards in this guide gave: brushed gold engrave at 500 mm/s and 50% (or 200 mm/s and 50% for a deeper mark), cut at 10 mm/s and 90%; green engrave at 200 mm/s and 40% with 120 lines per cm, cut at 8 mm/s and 100% over 4 passes. Use these as the centre of your own test card, especially on a different machine or wattage.
Q: Can a diode laser engrave white or blue acrylic? A: Yes, with more energy. White and blue reflect the most of a 445 to 455 nm diode beam, so they need more energy than dark or warm colours. Our white engraves red and white engraves blue two-tone have still been engraved and cut on a 10 W diode. If your test card shows nothing or a patchy mark, re-check focus, slow down, and try more power before ruling the colour out.
Q: Which two-tone colours are best for a diode laser? A: Brushed gold engraves black and green engraves white both have real 20 W diode results above. Beyond those, start with sheets where both layers absorb blue light: red engraves black, yellow engraves black, black engraves yellow and dark brown engraves yellow. Matte black and the dark wood grains also engrave well; their white cores need extra passes to cut.
Q: Can a diode laser cut two-tone acrylic? A: Yes, 1.5 mm cuts well on a 20 W diode: brushed gold in one pass at 10 mm/s and 90%, and green (white core) in four passes at 8 mm/s and 100%. Dark cores cut more readily than light ones. 3 mm is a challenge for lower-power diodes; our two-tone is more opaque than the regular cast acrylic we stock, which helps, but expect slow multi-pass cuts. For straight-edged pieces, engrave and score and snap instead.
Q: Are your two-tone sheets diode tested? A: Not in-house yet. Our two-tone and three-tone sheets are listed for CO2 lasers and are not part of our Diode Laser Tested collection. Real results from a 20 W xTool S1 and a 10 W diode are in this guide, and we will add more as laser crafters share them.
Q: Is it safe to engrave metallic or mirror acrylic with a diode? A: Be careful. Shiny surfaces can reflect part of the beam back into the laser head and damage the lens or diode module. Never engrave a true mirror face with a diode, keep the lid closed, and check your machine's manual on reflective materials. Brushed metallic two-tone caps engraved fine in a 20 W test, but stop the job if you see the beam visibly reflecting.
Q: Do I need special safety glasses for a diode laser? A: Yes. Use glasses rated for your laser's wavelength, usually 445 to 455 nm, with a suitable optical density. CO2 laser glasses do not protect against a blue diode beam.
Q: Should I leave the protective film on when engraving with a diode? A: No. Peel it off the face first. The film can melt into the engraving and leave residue.