


Laser-cut Christmas ornaments in acrylic
Updated Oct 2026TL;DR: A layered acrylic ornament is two or three flat parts glued into a stack: a 3 mm backplate that carries the hanger, a frame cut from glitter or mirror, and a name on top. The free MyLaserTools ornament generators produce all three layers as one SVG, sized anywhere from 60 to 150 mm. Size for 75 to 90 mm (3 to 3.5"), engrave before you cut, bond the layers with thin transfer tape, and leave the protective film on until assembly.
What you are making

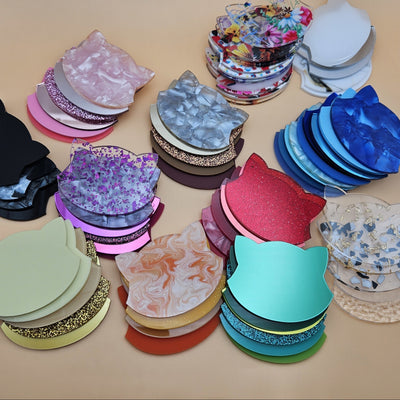
Every ornament in this guide is built the same way: flat acrylic parts cut on a laser and stacked. The colour comes from the material, not from paint. Gold mirror reads as metal, glitter catches the tree lights, and two-tone engravable acrylic lets you engrave a name or date into a coloured surface so the contrasting core shows through.
The ornament above is the Christmas Ornament Generator's three-layer design: a backplate, a ring with snowflake cut-outs, and a name that sits across the opening. The same structure works for snowmen, trees, hearts and paw prints.
What you need
- A laser that cuts 3 mm acrylic. CO2 is the easy route. A diode laser can work on dark, opaque colours but struggles with clear, white and mirror sheets, so check before you commit to a material.
- Acrylic for each layer. See the table further down. A 3" ornament uses about one fifteenth of a sheet per layer, so one sheet of each material covers a full batch.
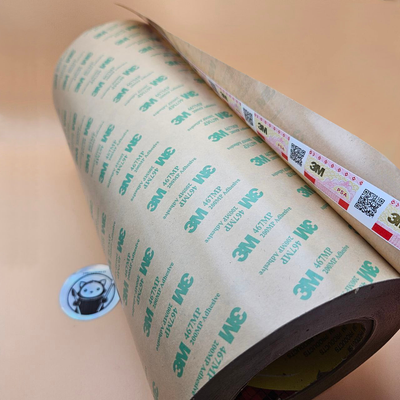
- Thin double-sided transfer tape for laminating layers: 3M 467MP (0.05 mm) or 3M 468MP (0.13 mm) from our 3M tape collection. Acrylic cement or CA glue also works; see the glue notes below.
- Ribbon, cord or ornament hooks, plus tassels if you use the tassel design.
- A design file. Free from the generators listed in step 1. No account or download fee.
Step by step
Step 1: Pick a generator.
Every one of these exports a layered SVG with cut lines grouped by layer, ready for LightBurn, xTool Creative Space or Glowforge.
| Generator | What it makes | Good first material |
|---|---|---|
| Christmas Ornament | Round ball, single, two- or three-layer, with snowflakes and a name or message | Mirror name over glitter or two-tone |
| Snowman Ornament | Three stacked circles, text in any circle, snowflakes fill the empty ones | White frame, glitter inserts |
| Christmas Tree Ornament | Tree outline with a name across it | Patterned or green acrylic, white name |
| Heart Ornament | Heart with a connected-script name | Red or patterned acrylic |
| Paw Print Ornament and Pet Memorial | Paw shape with a pet's name, or a winged paw with a message | Patterned or two-tone |
| Anniversary, First House, Memorial, Bookish | Rings, house and key, remembrance and book shapes with names | Two-tone for engraved messages |
| Christmas Ornament Map | A round city street map for a hometown or "where we met" ornament | Black streets over glitter |
| Hanging car charm with tassels | Round charm with a cord hole on top and three tassel holes below | Two colours of two-tone |
All of them are collected on our ornament generators page.

Step 2: Set the size and the hanger hole.
The Christmas Ornament Generator defaults to 100 mm, about 4". That is a statement ornament. For a tree full of them, 75 to 90 mm (3 to 3.5") is the common size, and it also fits more pieces per sheet.
Weight matters on a real branch. Acrylic weighs about 1.19 g per cubic centimetre, so a solid 75 mm disc of 3 mm acrylic is roughly 16 g and a 100 mm disc is roughly 28 g. The frame and name layers are mostly open space and add less. A three-layer ornament at 3 to 3.5" hangs comfortably; a 150 mm three-layer piece wants a sturdy branch or a wall hook.
The hanger hole setting runs from 4 to 15 mm, default 8 mm, and the generator builds a hanging loop around it. The default takes thin ribbon, baker's twine and standard wire ornament hooks. Go larger only if you plan to thread wide ribbon.
By default the hanger loop is only on the backplate. That is what you want: the backplate is the rigid layer and carries the weight. Turn on "add hanger to all layers" only if you want the loop to show the frame colour too.
Step 3: Choose a material for each layer.

| Layer | Its job | Materials that work | Thickness |
|---|---|---|---|
| Backplate | Rigid base, carries the hanger, shows through every opening | Two-tone (engrave a date or message on it), pearl, or a solid colour | 3 mm; 1.5 mm for a light two-layer piece |
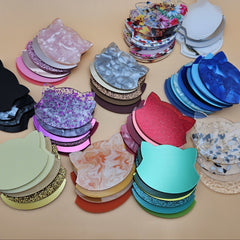
| Frame | Adds colour and depth around the edge | Glitter, mirror, or a contrasting two-tone | 1.5 to 3 mm |
| Name | The personalisation people pay for | Gold or silver mirror, coloured mirror, or white | 3 mm cut name, or engrave it into a two-tone layer instead |
A few pairings that work well:
- Gold mirror name and frame over a pearl or white backplate. Classic, and the mirror reads from across the room.
- Red glitter frame, silver mirror name, white backplate. The glitter carries the colour so the name can stay metallic.
- A two-tone backplate with an engraved message, mirror name on top. Two personalisations in one ornament: the name up front, a date or "Baby's first Christmas" engraved behind it.
- Black streets over a glitter backplate for map ornaments. The streets are one cut layer, the glitter shows through every block.

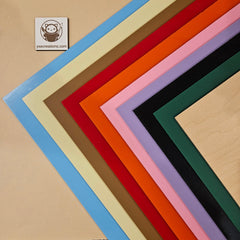
Mirror and glitter come as 30 x 48 cm (about 12 x 19") sheets, gold and silver mirror in 3 mm and the coloured mirrors in 2.6 mm. Two-tone comes as 30 x 60 cm (about 12 x 24") sheets in 1.5 mm and 3 mm. If your bed is 12 x 20", one score-and-snap cut makes the two-tone sheet fit; see how to cut acrylic without a laser.
Step 4: Make a batch file if you are doing more than a few names.
The Christmas Ornament Generator has a batch mode. Paste a list of names, one per line, and it exports one SVG per layer: every backplate on one sheet, every frame on another, every name on a third, already spaced 5 mm apart. Run each file on its own material. This is the fastest way to make a family set or market stock.
Step 5: Engrave first, then cut.
On any layer that has both engraving and cutting (an engraved two-tone backplate, for example), run the engrave pass first and the cut last. While the sheet is still whole it cannot shift, so the engraving lands where the design says. Cut parts can drop slightly into the honeycomb or move with air assist, and an engrave after that point lands off-centre.
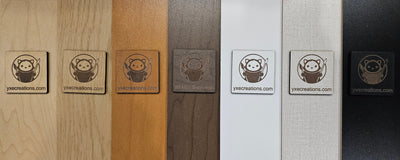
For two-tone, the engrave only needs to remove the thin cap layer. Use a light, fast pass and test on an offcut first; heavy engraving digs into the core and leaves a rough, darker groove. Our two-tone acrylic guide covers settings and colour pairs, and the laser settings database lists cut settings for cast, glitter and mirror acrylic by machine.
Laminate the transfer tape onto the back of the name sheet before you cut it. Every letter then comes off the laser bed already adhesive-backed, and you never have to line tape up with a 3 mm letter by hand. Run a small test cut first, because some machines leave the cut edges of the tape slightly tacky at high power.
Step 6: Keep the film on through cutting.
Glitter and mirror sheets ship with a protective film on both sides, and it is laser-safe. Leave it on while you cut. It keeps smoke residue off the faces and protects the mirror surface from scratches while you sort parts. Peel it right before assembly, one part at a time.
Step 7: Assemble the layers.
Dry-fit the stack first so you know where the name sits. Then bond:
- Transfer tape (467MP or 468MP). Full-coverage, no cure time, no squeeze-out. The best option for mirror and glitter, and for names with thin script strokes. 468MP is thicker and more forgiving if a layer is not perfectly flat.
- Acrylic cement (solvent). The strongest bond between plain acrylic layers, but it can attack the painted backing of mirror acrylic and leave marks. Test on an offcut before you use it on mirror.
- CA glue. Fast, but it can fog (leave a white bloom) on glossy and mirror faces. Use tiny amounts, away from visible edges.
The best glues for acrylic guide compares all three in detail. Press each layer firmly for a few seconds; transfer tape bonds by pressure, not time.

Step 8: Add the ribbon or tassels.
Thread a short loop of ribbon or cord through the hanger hole and knot it, or use a wire ornament hook. The tassel charm design has three holes along the bottom edge; attach tassels with a lark's head knot so they hang straight. We carry tassels in several colours, and a coordinated colour (red with gold, white with silver) makes the whole piece look finished.
Step 9: Package it.
A clear cello bag with a tissue backer protects the faces and lets the buyer see the ornament. If you include a care card, the essentials are:
- Dust or wipe with a soft, damp cloth.
- No glass cleaner, alcohol or ammonia sprays. They can craze (fine-crack) acrylic and dull mirror faces.
- Store flat, wrapped in tissue, away from heavy objects.
More ornament ideas

- Tree ornaments with a single bold name: an easy two-layer build.
- Map ornaments of a hometown, a first home or the city where a couple met.
- Pet ornaments in patterned acrylic with the pet's name in white.
- Stocking tags with the Stocking Tag Generator: a connected-script name on a strip. They work in acrylic and in leatherette.
- Santa hat name keychains from the Hat Name Keychain Generator: small, cheap to make, a good stocking stuffer.


Frequently asked questions
Q: What size should a laser-cut Christmas ornament be? A: 75 to 90 mm (3 to 3.5") is the common size for tree ornaments. It is light enough for a normal branch and fits well on a sheet. 100 mm (4") and up works as a statement piece or a gift-topper ornament.
Q: What thickness of acrylic is best for ornaments? A: 3 mm for the backplate, because it carries the hanger and the weight. Frames and names can be 1.5 to 3 mm. A two-layer ornament on 1.5 mm two-tone over a 3 mm backplate is light and still feels solid.
Q: How do I glue acrylic ornament layers together? A: Thin double-sided transfer tape such as 3M 467MP or 468MP is the cleanest option, especially for mirror and glitter. Acrylic cement gives the strongest bond on plain acrylic but can mark mirror backing. CA glue is fast but can fog glossy faces.
Q: Can I engrave a name instead of cutting it? A: Yes. Engrave it into two-tone acrylic: the laser removes the thin coloured cap and the contrasting core shows through. It gives a flatter, more subtle look than a raised mirror name, and you can combine both on one ornament.
Q: Do the free ornament files cost anything? A: No. The MyLaserTools generators are free to use, and the SVG export has no fee. Each export groups the cut lines by layer.
Q: Can I make ornaments on a diode laser? A: Partly. Diodes engrave and cut dark, opaque acrylic, but clear, white and mirror acrylic reflect or pass the diode's blue light and cut poorly or not at all. Plan the ornament around dark, opaque layers and test each material first.
Q: How many ornaments can I cut from one sheet? A: With the generator's default 8 mm hanger loop and 5 mm spacing, a 30 x 60 cm sheet fits 18 ornaments at 3" (3 across, 6 down), and a 30 x 48 cm mirror or glitter sheet fits 15. Each layer comes from its own sheet.