


Protective film on acrylic: when to peel it and when to leave it on
Updated Oct 2026TL;DR: Leave the protective film on both faces when you cut acrylic. It catches smoke residue and back-reflection marks that would otherwise land on the finished face. Peel the top film before you engrave two-tone or three-tone acrylic, and before you frost clear or coloured acrylic, because film melts into an engraving. Swap the film for paper masking when it lifts, bubbles or keeps welding to slow cuts. Peel slowly at a shallow angle and clean residue with mild soapy water only.
What the film is for
Almost every acrylic sheet ships with a protective mask on both faces. Ours use a thin polyethylene (PE) film. Some other suppliers use paper masking. Both exist for the same reason: acrylic scratches easily, and a scratch on a glossy face is permanent.
The film is laser-safe, so you can cut straight through it. During a cut it does a second job. When the laser vaporises acrylic, some of that vapour rises out of the cut and settles on the surface as a light haze. On the bottom face, the beam can reflect off the honeycomb or slats and leave small marks. With the film on, all of that lands on the film and peels away with it.

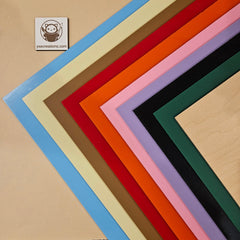
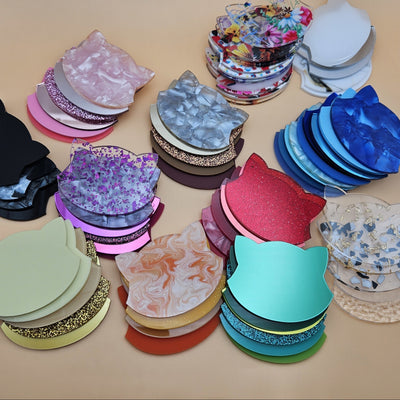
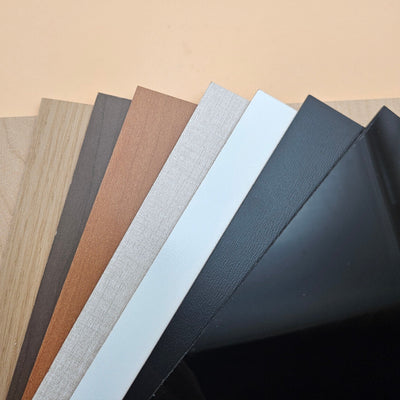
The matte, slightly dusty look of the sheets above is the film, not the acrylic. Under it, the face is glossy and clean, as the bright orange edge shows.
Peel it or leave it on: the short answer

| Job | Top film | Bottom film |
|---|---|---|
| Cutting only | Leave on | Leave on |
| Engraving two-tone or three-tone acrylic | Peel before engraving | Leave on |
| Frosting clear or coloured acrylic | Peel, re-mask with paper if you want | Leave on |
| Engraving the front of mirror acrylic | Peel before engraving | Leave on |
| Engraving the painted back of mirror acrylic (sheet flipped) | Peel (this is the painted back) | Leave on (the mirror face is on the bed) |
Why film and engraving do not mix
An engraving pass removes a very shallow layer of material in a raster pattern. PE film does not burn away cleanly like paper. It shrinks and melts at the edge of every engraved line, so you get a ragged boundary, sticky strands inside fine text, and film that is hard to peel from small counters in letters like "e" and "a".
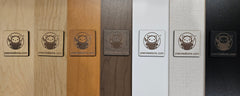
On two-tone and three-tone engravable acrylic it matters even more. The coloured cap layer is thin, and your settings are tuned to remove just that layer. Any film left on top absorbs part of the energy, so the cap is removed unevenly and the core colour shows in patches. That is why our engravable sheet listings say to peel the film before engraving.
On a two-tone job that is engraved and then cut, peel only the top film. Keep the bottom film on so the back of the piece stays clean during the cut.
Paper masking versus PE film
Paper masking (also sold as paper transfer tape or application tape) is the other common mask. It handles some jobs better than PE film:
- Engraving through a mask. Paper burns away cleanly where the laser passes, so you can engrave clear acrylic through it and keep smoke haze off the surrounding surface. PE film melts instead.
- Slow or multi-pass cuts. On 3 mm and thicker, a slow cut or several passes can weld PE film to the top edge of the cut. Paper does not weld.
- Damaged film. A scratched, lifted or bubbled film is better replaced. A loose flap deflects air assist and can catch a small flame.
PE film is better for storage and handling. It does not tear, stays on through shipping and comes off in one piece. That is why sheets ship with it. Use paper when the job needs it.
Step by step: cut, peel and clean
Step 1: Check the film before the sheet goes in.
Look for lifted corners, bubbles and scratches. Press small bubbles flat with your thumb. If a corner has lifted, hold it down with a strip of low-tack masking tape. If the film is badly damaged, peel it off and apply paper masking across that face.
Step 2: Decide per face.
Use the table above. Cutting only: both films stay on. Engraving: peel the face you engrave. If you are frosting clear acrylic and want a perfectly clean surround, apply paper transfer tape to that face, squeegee it flat and engrave through it.
Step 3: Engrave first, then cut.
Run the engraving while the sheet is still one piece and perfectly flat. Then run the cut. Leave the parts in place until the job finishes, so a loose piece does not shift under the head.
Step 4: Peel the film from the parts.
Start at a corner with a fingernail or a plastic weeding hook. Avoid a craft knife on the face; one slip leaves a scratch. Pull the film back at a shallow angle, close to parallel with the surface, and keep the pull slow and steady.
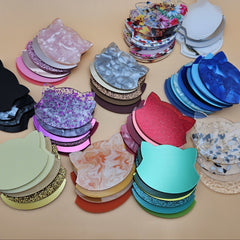
For small parts such as earrings and charms, press a strip of masking tape onto the film, rub it down and lift. The tape grips the film better than your fingers do. For a large batch, a wide roll of masking tape pressed across several parts at once lifts the film from all of them in one pull.
Step 5: Clean any residue.
If the film leaves a faint adhesive mark or smoke haze reaches the face, wash the part in lukewarm water with a drop of mild dish soap. Wipe with a soft microfibre cloth and pat dry.
Do not clean acrylic with acetone, nail polish remover, glass cleaner with ammonia, or alcohol on the face. Solvents can craze acrylic: a network of fine cracks that appears hours later, especially near cut edges where the material is stressed.
When the film causes problems
The film welded to the cut edge. Common on slow cuts and multi-pass cuts in 3 mm and thicker. Peel slowly from the middle of the face toward the edge; the welded strip usually releases last. Next time, swap to paper masking on the top face or tune your settings for one clean pass.
The film lifted during the cut. Air assist got under a loose edge. Tape the edges of the sheet down, or replace the film on that face with paper masking.
Stray strands of melted film in an engraving. The film was on during an engraving pass. Pick the strands out with a weeding hook or a piece of tape. Next time, peel first.
The film will not come off an old sheet. PE film can bond more strongly after long storage, especially in heat or sunlight. Start at a corner and peel very slowly. Warm, soapy water on the edge sometimes helps. Store sheets flat, indoors and out of the sun.
Dust sticks to the part after peeling. Peeling film creates static. Wipe with a slightly damp microfibre cloth to discharge the surface.
Frequently asked questions
Q: Do I leave the protective film on when laser cutting acrylic? A: Yes. Leave it on both faces for cutting. It catches smoke residue and back-reflection marks and peels away clean afterwards.
Q: Should I peel the film before engraving? A: Yes. PE film melts into an engraving and leaves ragged edges. Peel the face you engrave and keep the other face covered.
Q: Is the film on acrylic safe to laser? A: The PE film on our sheets is laser-safe. If you buy acrylic elsewhere and are not sure what the mask is, ask the supplier. Never laser a film you cannot identify; some films, such as PVC, release harmful gases. See materials you should never laser cut.
Q: What is the best way to peel film off small acrylic pieces? A: Press masking tape onto the film and lift. For a batch, lay a wide strip across several pieces and pull them all at once.
Q: How do I remove sticky residue from acrylic? A: Lukewarm water with a drop of mild dish soap and a microfibre cloth. Avoid acetone, ammonia glass cleaner and alcohol on the face, because they can craze acrylic.
Q: When should I use paper masking instead of the film? A: When the film is damaged or lifting, when you engrave through a mask, and when slow or multi-pass cuts keep welding the film to the cut edge.