

Getting ready for a Christmas craft market as a laser crafter
Updated Oct 2026TL;DR: A Christmas market rewards a short, well-stocked line-up more than a big catalogue. Pick four to six products, make most of them ahead, and handle personalised orders with pre-cut popular names or order-and-pickup. Work out material cost per piece from how many parts fit on a sheet: a 30 x 60 cm sheet holds 18 ornaments at 3" or 80 small tags. Price with a formula, show prices clearly, and pack acrylic for the cold.
This guide is written for laser crafters selling at indoor and outdoor winter markets in Canada. Venue rules, table fees and dates vary by market, so check with your organiser for anything specific to your event.
1. Read the venue rules before you plan stock
Before you cut anything, confirm three things with the organiser: the table size, whether you get power, and what equipment is allowed. Table size decides how much you can display. Power decides whether you can light the table or charge a card reader.
Running a laser at your table is rarely practical. It needs fume extraction, a steady power supply and a stable surface, and most venues will not allow it. Plan on doing all your cutting at home and handling personalisation in other ways (point 3).
2. Pick four to six product lines
A table with five products in depth sells better than a table with twenty products one of each. Buyers decide fast, and a full basket of one item reads as "popular". These are the lines that suit a laser crafter at a Christmas market:
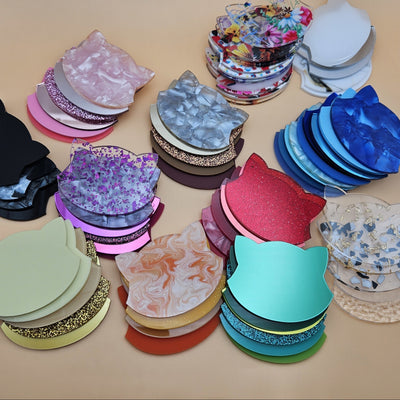
- Personalised ornaments. The anchor product. Names, years, "our first Christmas", pets, map ornaments of the local city. See the ornaments project for build steps and free files.
- Stocking tags. A name in connected script on a strip of leatherette or acrylic. Fast to make, easy to display on a rail.
- Gift tags. Small, low cost, sold in sets. An easy add-on at the till.
- Keychains. Names, initials, santa hat names. The impulse item, especially for kids and teens buying gifts.
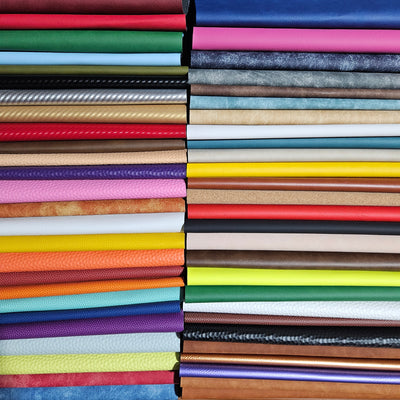
- Leatherette patches and tags. Hat patches, beanie tags, luggage tags. They appeal to buyers who walk past ornaments.

Aim for a price ladder: one impulse item, one or two core items, and one premium item. The impulse item gets people to stop, and the premium item makes the core items look reasonable.
3. Decide what to make ahead and what to personalise
Personalised pieces sell best, but you cannot engrave on the spot. Use a mix of three approaches:
- Finished stock. Designs with no name: snowflakes, "Merry Christmas", "Joy", the local city map. Cut these in quantity. Avoid printing the year on stock you might carry over to next season.
- Pre-cut popular names. Cut the name layers for the most common names in your area and keep them sorted alphabetically in a small organiser. Your province's published baby-name lists are a good source. The buyer picks a name and a base, and you assemble with transfer tape at the table in under a minute.
- Order and pickup or ship. For anything else, take the order at the table with the spelling, colour and contact details, then deliver after the market. Show a sample board of materials so buyers can point at a colour.
4. Work out how much stock to cut
There is no universal number, because it depends on the market's size and foot traffic. Work it out from a target instead of a guess:
- Set a sales goal for the day.
- Divide by your average price to get the number of pieces you need to sell.
- Split that number across your lines by the mix you expect (for example, half ornaments, a quarter tags, a quarter keychains and patches).
- Cut 25 to 50 percent more than that, so the table still looks full in the last hour.
Undated, unpersonalised stock carries over to next year, so overcutting those lines is low risk. Keep dated and personalised stock tight. After your first market, your own sales tally (point 12) replaces the guesswork.
5. Work out material cost per piece
Material cost per piece comes from one number: how many pieces fit on a sheet. The diagram shows the counts for the most common market items, using 5 mm between pieces and 4 mm from the sheet edge, the same spacing the MyLaserTools batch export uses.

How the counts work, for a 3" (76 mm) ornament with the generator's default hanger loop (about 76 x 90 mm overall) on a 300 x 600 mm sheet:
- Across: 300 mm, minus 4 mm at each edge, fits 3 ornaments with 5 mm gaps (3 x 76 + 2 x 5 = 238 mm). A fourth would need 320 mm.
- Down: 600 mm fits 6 rows (6 x 90 + 5 x 5 = 565 mm). A seventh would need 660 mm.
- Total: 3 x 6 = 18 ornaments per sheet.
The same arithmetic gives 15 ornaments on a 30 x 48 cm mirror or glitter sheet, 80 tags of 2 x 1.25" on a 30 x 60 cm sheet (5 across, 16 down), and 25 patches of 3 x 2" on a 12 x 18" leatherette sheet (5 across, 5 down). If your laser bed is 12 x 20", score and snap the 30 x 60 cm sheet to about 50 cm: the main piece holds 15 ornaments and the 10 cm strip holds 3 more, so you still get 18.
The formula:
Material cost per piece = (sheet cost ÷ pieces per sheet) x 1.1 + extras
The 1.1 adds 10 percent for test cuts, misfires and the odd cracked part. Extras are the per-piece consumables: tape, ribbon, a cello bag, a card.
A worked example. These sheet costs are placeholders to show the arithmetic, not our prices; use the numbers from your own invoice.
| Item | Layers and sheets | Example sheet cost | Pieces per sheet | Material per piece |
|---|---|---|---|---|
| 3" two-layer ornament | Two-tone backplate + glitter frame | $20 each | 18 and 15 | ($20 ÷ 18 + $20 ÷ 15) x 1.1 = $2.69 |
| 2 x 1.25" gift tag | One two-tone layer | $20 | 80 | $20 ÷ 80 x 1.1 = $0.28 |
| 3 x 2" leatherette patch | One leatherette layer | $10 | 25 | $10 ÷ 25 x 1.1 = $0.44 |
Add the extras on top. The point of the table is the pattern, not the dollar figures: small tags cost almost nothing in material, so their price is mostly your time and design. Ornaments carry more material, especially multi-layer ones from smaller mirror and glitter sheets.
If you are stocking up on many sheets at once, our Buy More Save More tiers apply across acrylic, TruFlat and leatherette sheets, starting at 10 sheets.
6. Price with a formula, then check it against the room
Material is usually the smallest part of the price. A workable formula:
Price = (material + extras + your time at an hourly rate + a share of the table fee) x a markup for profit
For the table fee, divide it by the number of pieces you expect to sell and add that share to each piece. Our article on pricing acrylic crafts for Etsy and craft shows goes through each part in detail.
Then walk the market, or look at past photos of it, and check where your prices sit. If you are far below everyone else, you are probably underpricing your time. Round to prices that make change easy.
7. Cut in batches, one material at a time
Switching materials on the laser costs time: new settings, new focus, a new test. Group your cutting by sheet instead of by product.
The Christmas Ornament Generator and the Keychain Generator both have a batch mode. Paste a list of names, one per line, and you get one SVG per layer with every part already spaced on a 300 mm wide sheet. Cut every backplate from one material, every name from another, then assemble in one sitting.

8. Build a display with height
A flat table hides small items. Get things up to eye level:
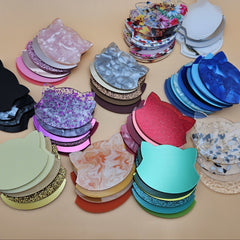
- Hang the ornaments. A small ornament tree, a branch in a weighted pot, or a pegboard with hooks. Mirror and glitter only show what they are when light moves across them, so hanging beats lying flat.
- Rails for stocking tags and keychains. A dowel or towel rail with S-hooks.
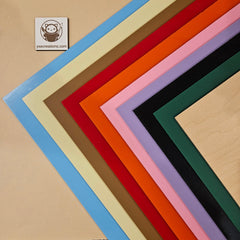
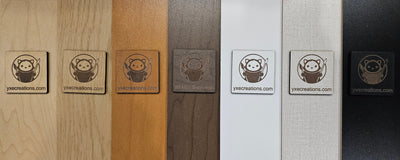
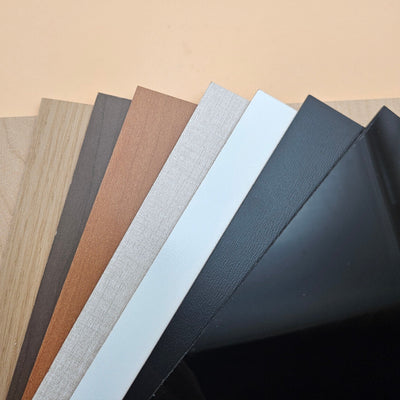
- A sample board. One sample of every material and colour you offer for custom orders, labelled. It answers "do you have it in blue?" without digging through bins.
- Light. Indoor markets can be dim. A battery LED strip or clip light on the ornament display makes mirror pieces glow.
- Keep back stock out of sight, in labelled bags under the table, and restock the display as it empties. A gap on the display looks like "sold out", not "popular".

9. Make your signs on the laser
Your signs are a product sample too. Two free generators cover what a market table needs:
- Standing Sign Generator: a free-standing table sign for your shop name, a price list, or "Custom names, ask us".
- QR Code Sign Generator: a QR code pointing to your online shop, Instagram or a custom order form. Buyers who do not buy today can find you in December.
Put prices where buyers can see them without asking. Many people walk away rather than ask a price.
10. Sort out payments before the day
- A card reader that takes tap, for debit and credit. Test a real transaction at home a few days before.
- A battery pack and charging cable. Readers and phones drain faster in the cold.
- Check whether your reader can take payments offline, and how it handles them, in case the venue's signal is weak.
- A cash float in small bills and coins, sized to your price points.
11. Pack for the cold
Acrylic becomes more brittle as it gets colder. A piece that would bounce off the floor at room temperature can crack after a night in a cold car. For winter markets:
- Pack acrylic flat in rigid bins, with tissue or foam between layers. Do not let pieces slide around loose.
- Do not leave stock in the car overnight when it is well below freezing.
- Assemble at room temperature. Transfer tape and glues bond poorly on cold parts. Do your assembly at home, and if you assemble pre-cut names at the market, keep that kit inside your coat or a warm bag.
- Expect fogging. Mirror and glossy pieces carried from a cold car into a warm hall can fog with condensation for a few minutes. Let them clear before you set them out, and do not wipe them with a rough cloth.
- Outdoor markets: handle stock gently in the cold, and keep a small soft cloth for snow and fingerprints.
12. Keep a tally for next year
Write down what you sold by line, which names and colours people asked for, and which custom orders you took. After one market you will know your real mix, and next year's "how much to cut" is no longer a guess.
The printable checklist

Print it, pin it above the laser and tick it off as you go.
Frequently asked questions
Q: What laser-cut items sell best at Christmas markets? A: Personalised ornaments are the anchor product, supported by smaller items: stocking tags, gift tags, name keychains, and leatherette patches or tags. Keep the line-up to four to six products with real depth in each.
Q: How do I sell personalised items if I cannot laser at the market? A: Pre-cut name layers for the most common names in your area and assemble them at the table with transfer tape, and take orders for everything else with pickup or shipping after the market. Bring a sample board of materials so buyers can choose colours.
Q: How many ornaments can I cut from one sheet of acrylic? A: With 5 mm between pieces and a standard hanger loop, a 30 x 60 cm sheet fits 18 ornaments at 3", and a 30 x 48 cm mirror or glitter sheet fits 15. Each layer of a layered ornament comes from its own sheet.
Q: How do I calculate material cost per piece? A: Divide the sheet cost by the number of pieces that fit on the sheet, multiply by 1.1 to allow for test cuts and mistakes, and add per-piece extras like tape, ribbon and packaging. For a layered piece, do this for each layer and add them up.
Q: Is acrylic safe to transport in winter? A: Yes, with care. Acrylic is more brittle when cold, so pack it flat in rigid bins with padding, avoid leaving it in a freezing car overnight, and handle it gently until it warms up. Assemble layers at room temperature, because adhesives bond poorly on cold parts.
Q: How much stock should I bring to my first market? A: Work back from a sales goal: divide it by your average price, split the result across your product lines, then cut 25 to 50 percent extra so the table stays full. Overcut undated designs that can carry over to next year, and keep dated and personalised stock tight.