

Best glues for acrylic: solvent welding, CA, epoxy, tape
Updated Jun 2026TL;DR: For most acrylic-to-acrylic joints, solvent welding (water-thin methylene-chloride-based cement) is the strongest, cleanest, and most invisible option. Cyanoacrylate (CA) glue is faster but shows a hazy line. Epoxy is the right choice when you are bonding acrylic to something other than acrylic. For surface-mounted assembly without curing time, 3M double-sided tape works well. This article covers what to use for each situation.
Four families of adhesive
There are four main approaches when joining acrylic:
- Solvent welding. A thin water-like solvent (methylene chloride based) that softens both surfaces and lets them fuse together as the solvent evaporates. The bond is the acrylic itself, not a separate adhesive layer. Sold at most plastic-supply and hobby stores in small applicator bottles.
- Cyanoacrylate (CA, super glue). A reactive adhesive that cures fast in the presence of moisture. Sits as a thin layer between the surfaces.
- Epoxy and structural adhesives. A thicker layer of two-part chemistry that bonds many materials including acrylic. Sold at hardware and craft stores in small two-tube packs.
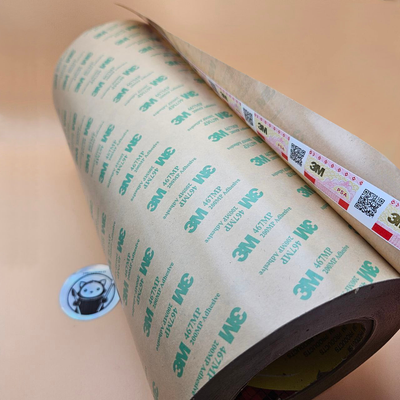
- Double-sided tape (3M tape collection). A pre-applied pressure-sensitive adhesive on a foam carrier. Apply, peel, press. No curing time. Right for surface mounts and assembly where solvents are inconvenient.

Each has its own strengths and weaknesses.
When to use what
- Two flat pieces of cast acrylic, invisible joint → solvent welding. Welds the parts into one piece.
- Quick assembly, joint will not be seen → CA glue (medium viscosity). Fast cure, easy to apply.
- Acrylic to wood or metal → epoxy or polyurethane. Solvent welding only works acrylic to acrylic.
- Mounting acrylic to a surface (wall, sign substrate) → 3M tape. No curing time, clean install.
- Structural load (signs that will be handled often) → two-part structural acrylic. Stronger than solvent welding for some load cases.
- Filling a gap or imperfect joint → thickened CA or epoxy. Solvent welding needs a tight fit.
Solvent welding, the gold standard
Acrylic solvent cement is a thin watery solvent (most are methylene chloride based) that dissolves a thin layer of acrylic on each surface. When the two surfaces are pressed together, the dissolved layers flow into each other. As the solvent evaporates, you are left with a single piece of acrylic.
Sold under several brand names at plastic-supply and hobby shops. The common product is a water-thin solvent in a small applicator bottle with a fine needle tip; pick whichever is available locally.
How to apply:
- Cut your parts with the laser. The cut edges are already very flat and clean, which is what solvent welding needs.
- Dry fit and clamp the pieces together with masking tape.
- With a fine-tip applicator (a glass syringe is best, a fine-tip needle bottle works), run a thin bead of solvent into the seam. Capillary action wicks it through.
- Hold or clamp for 30 seconds.
- Leave overnight before stressing the joint. Full strength in 24 to 48 hours.
The joint is glass-clear and invisible if done right.
Solvent welding works best on cast acrylic. Extruded acrylic dissolves less uniformly and you get hazy joints. This is one of the reasons we recommend cast for almost every project.
CA glue: fast, decent, visible
Cyanoacrylate is the right call for fast assembly when the joint will not be seen. The cure happens in seconds with a tiny bit of moisture in the air or on the surfaces. CA bonds acrylic to acrylic well but the joint is always slightly visible: a fine white or hazy line at the seam.
How to use:
- Cut your parts.
- Apply a tiny dot or thin bead of medium-viscosity CA. Too much and the joint will fog from "blooming" (CA reacts with air moisture and creates a white haze on nearby acrylic surfaces).
- Press firmly for 10 to 20 seconds.
- Avoid CA on visible faces of the acrylic. The bloom can be sanded but never fully polished out.
Brand-name CA glues from any hardware store work; cheap generic super glue blooms more aggressively, so pay a little extra for a name brand intended for hobby use.
Epoxy: for mixed materials
When you need to bond acrylic to wood, metal, fabric or anything other than acrylic, epoxy is the choice. Solvent welding does not work because there is no acrylic to dissolve on the other side.
Two-part 5 minute epoxy works fine for small craft projects. For load-bearing or long-term use, 24 hour epoxy gives better strength.
How to use:
- Mix exactly 1 to 1 on a scrap card.
- Apply to the dry, clean surfaces with a toothpick.
- Press together. Use tape or a clamp.
- Avoid getting epoxy on the visible faces of the acrylic. Cured epoxy on acrylic is hard to remove without sanding.
Structural acrylic adhesives
Two-part methacrylate-based structural adhesives bond acrylic, ABS, PETG, and many other plastics with structural strength higher than the plastic itself. Used in boat building, signage, and automotive. Overkill for most craft, but the right answer for signs that will live outdoors for years. Sold by industrial-adhesive suppliers; ask for a methacrylate structural adhesive rated for plastics.
3M double-sided tape
For mounting acrylic to a wall or any flat surface where you do not need a chemical bond between two acrylic pieces, double-sided tape is faster and cleaner than glue. No curing time, no clamping, no smell. The 3M tape collection carries the variants suited to acrylic-on-substrate work. Surface prep (alcohol wipe on both surfaces) is non-negotiable.
Bonding gotchas
A few things that will ruin even a good adhesive choice:
- Paper masking left on the surface. Remove the masking from the bonding area before applying any adhesive. Solvent will not penetrate paper, epoxy will not bond to paper.
- Visible scratches or saw marks on the bonding edge. Solvent welding needs the edges to mate flat. Laser-cut edges are great for this. Hand-cut or sawn edges need to be sanded flat with 220 grit first.
- Cold parts. Solvent welding wants room-temperature parts. If your parts have been in a cold garage, warm them up first.
- Trapped air bubbles. When solvent welding, push slowly from one end so air escapes out the other. Bubbles are visible forever.
- Pressing too hard. Solvent welding only needs gentle contact. Too much pressure squeezes out the dissolved layer and gives you a weaker joint.
Solvent welding pros:
- Invisible joint
- Strong as the parent material
- Cheap once you have a bottle
Solvent welding cons:
- Needs tight fitting edges
- Slow full-cure time (24 to 48 hours)
- Solvent vapours need ventilation
CA pros:
- Fast cure (seconds)
- No special applicator needed
- Bonds many surfaces
CA cons:
- Visible joint line
- Blooms (hazes nearby acrylic) if over-applied
- Brittle under shock load
Epoxy pros:
- Bonds mixed materials
- Gap-filling
- Predictable cure schedule
Epoxy cons:
- Visible bead
- Mess to clean up
- Slow vs CA
Frequently asked questions
Q: Can I use water-thin solvent on extruded acrylic? A: You can, but the joint is rarely as clean as on cast. Solvent welding is one of the cases where cast acrylic clearly wins.
Q: There are several solvent-welding brands at the plastic store. Are they the same? A: Most water-thin acrylic solvents are methylene chloride based and behave similarly. The differences are in viscosity (water-thin vs thickened) and applicator design. Water-thin is right for tight-fit joints; thickened is right for joints with gaps or thick edges.
Q: How do I avoid CA blooming on a visible face? A: Use medium-viscosity CA (not thin) and apply tiny amounts inside the joint. Wipe the area before the CA off-gasses. Some people use anti-bloom accelerators that flash-cure the CA before it can off-gas.
Q: My solvent-welded joint feels strong but I can see a fine line. What did I do wrong? A: Usually the edges were not perfectly flat, or you used too little solvent. The fine line is air that got trapped. Try a more generous wick of solvent next time and hold the parts together more slowly so air can escape.
Q: Does solvent welding work on coloured cast acrylic? A: Yes. The colour does not matter. What matters is that both surfaces are cast acrylic. Coloured cast bonds to clear cast invisibly.
Q: Can I use household super glue? A: It works, but cheap super glue blooms more than name-brand hobby CA. Buy a small bottle of name-brand medium-viscosity CA and use it specifically for acrylic.
What to read next
- Cast vs extruded acrylic for laser
- Materials you should never put in a laser
- How to remove paper masking without leaving adhesive
- Shop our cast acrylic
- Shop 3M tape (the assembly category we stock): /collections/3m-tape