


Bookmark Making 101: A Crafty Adventure You Didn't Know You Needed
Updated Jun 2026TL;DR: A laser-cut bookmark is one of the fastest projects to make and one of the easiest to sell. This guide covers the three materials worth using (acrylic, leatherette, TruFlat), the right thickness for each, sizing that fits real books, and a step-by-step from blank to finished piece. About 20 minutes per bookmark once your settings are dialled in.
What makes a good bookmark
A bookmark has three jobs. It has to slide between pages without pushing them apart, stay put when the book is closed, and survive being shoved in a bag for months. Everything else is decoration.
That gives three hard rules:
- Thin enough to disappear. A bookmark thicker than 2 mm starts to splay pages and damage the spine on softcover books.
- Long enough to find. It needs to stick out of the top of the book by at least 20 mm so you can grab it without flipping pages.
- Stiff enough to slide. A floppy bookmark folds when you push it into a closed book. Either the material is stiff, or you give it a tassel that lets you pull from the top.
Most off-the-shelf bookmarks fail one of those three. Yours will not.
Materials worth using
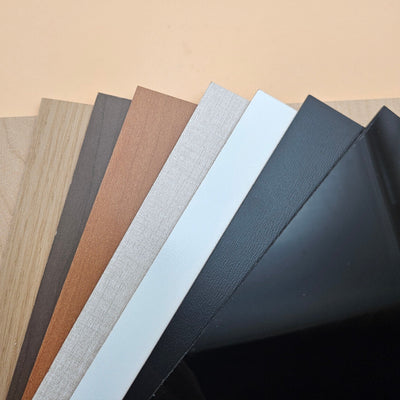
Three materials cover almost every bookmark you would want to make. We stock all three.
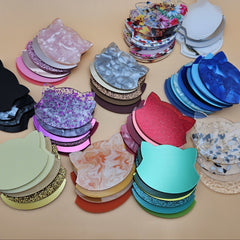
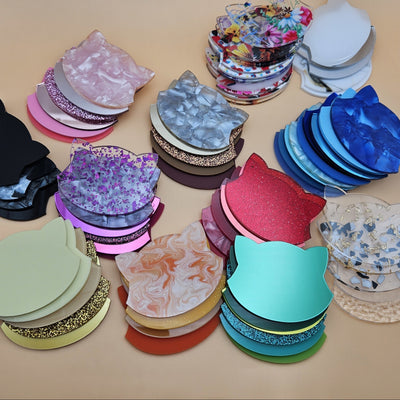
Acrylic (1.5 mm to 3 mm). Crisp edges, polished face, holds engraving cleanly. Transparent acrylic doubles as a tag holder for layered designs. Mirror acrylic makes a striking bookmark that reflects page colour. For sizing on acrylic specifically, see our acrylic thickness guide.
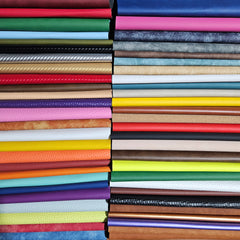
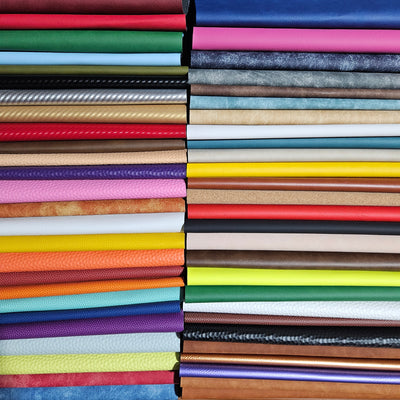
Leatherette (1.0 mm). Soft hand feel, flexible enough to ride flush against a closed book, takes laser engraving as a clean colour contrast against the surface. This is the material for personalised bookmarks: monograms, names, quotes. Leatherette ships with a TPU iron-on adhesive backing, which you can use to bond a second colour for two-tone designs. See the PU leatherette thickness guide for why 1.0 mm is the right call here.
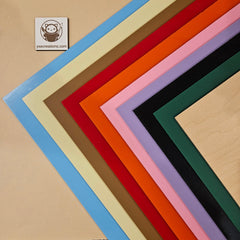
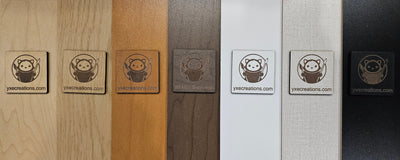
TruFlat (3 mm). Our engineered laser panel with an MDF core and a tuned surface. Crisp engrave, flat sheets that do not warp on a shelf, predictable cut every time. Good for woodgrain-look bookmarks and for designs where you want to engrave deep without losing detail.
What is not on this list: fabric, cereal-box card, pressed flowers, foiled cardstock. They are fine for a hand-craft afternoon. They are not what you want if you are making bookmarks to sell, gift in a set, or use as inserts in a paid product.

Sizing that actually works
Bookmark sizes are not standard, but the working range is narrow.
- Width: 30 mm to 50 mm. Narrower than 30 mm and the bookmark twists out of the book; wider than 50 mm and it pushes pages apart.
- Length: 150 mm to 200 mm. Long enough to clear the top of a paperback by at least 20 mm, short enough to fit inside a hardcover dust jacket.
- Corner radius: 4 mm to 8 mm. Sharp corners snag and tear; tiny radii do not read as a design choice.
- Hole position: 8 mm to 12 mm from the top edge, 4 mm diameter for a tassel cord.
A safe default for a first design: 40 mm wide, 180 mm tall, 6 mm corner radius, 4 mm hole 10 mm from the top.
What you need
- One sheet of 3 mm acrylic, 1.0 mm leatherette, or 3 mm TruFlat. At least 50 by 200 mm per bookmark.
- A bookmark SVG (free designs on our free designs page, or draw your own to the sizes above).
- Tassel cord, ribbon, or thin twine (optional).
- For two-tone leatherette: a household iron, parchment paper, and a second leatherette colour.
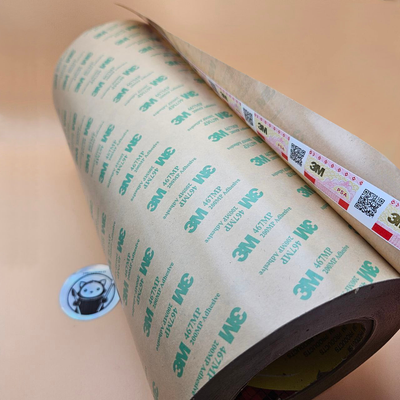
- Optional: a few squares of 3M tape for layered designs.
Step by step
Step 1: Draw or load the design. Open your design file in your laser software (LightBurn, RDWorks, or your machine's equivalent). Confirm the outline is set as a cut, any engraving is set as an engrave, and the tassel hole is a full cut-through circle. If you are layering two materials, separate the layers onto different colour-coded paths.
Step 2: Dial in settings on scrap. Always cut a 20 by 20 mm test square in the same material and thickness before running the real piece. Starting points on a 40 W CO2 laser:
- 3 mm acrylic, cut: 80 to 100 percent power, 10 to 15 mm/s, single pass. Air assist on.
- 1.0 mm leatherette, cut: 18 to 25 percent power, 100 to 150 mm/s, single pass.
- 3 mm TruFlat, cut: 70 to 90 percent power, 12 to 18 mm/s, single pass.
- Engrave on any of the three: 20 to 30 percent power, 250 to 400 mm/s, raster.
Diode lasers will need slower speeds or multiple passes, especially on acrylic. Cast acrylic engraves cleanly on a CO2; extruded acrylic does not. Confirm which one you have before cutting a finished piece.
Step 3: Cut the blank. Run the full design. Stay near the laser. Wood, MDF, and TruFlat are the most common laser-shop fire causes; bookmarks are small and the run is short, but the rule does not change.
Step 4: Weed and clean. Lift the bookmark off the bed. On leatherette, peel off the protective masking from both faces. On acrylic, leave the protective film on for now and peel it after the next step. On TruFlat, wipe the face with a dry microfibre cloth to remove char dust. Run a fingernail along the cut edge: if it is smooth, the cut is good. If it has fuzz or rough spots, lower the speed or add a pass next time.
Step 5: Engrave personalisation (optional). If your design has a name, monogram, or quote, run the engrave pass now. On leatherette, the engrave burns through the top colour and reveals the layer beneath, which gives a built-in two-tone effect with no extra material. On acrylic, the engrave shows up as a frosted contrast against the polished face. On TruFlat, the engrave is a darkened recess in the surface.
Step 6: Add a tassel (optional). Fold a 200 mm length of tassel cord in half, push the loop through the 4 mm hole, then thread the loose ends back through the loop. Pull snug. A tassel makes the bookmark easier to find and pull from a closed book, which is the practical reason to add one.
Step 7: Finish the edges. Acrylic edges look better with a flame polish on a 40 W CO2 laser, the cut itself usually polishes the edge as it cuts. Leatherette edges are sealed by the laser and need no finishing. TruFlat edges can be left raw or sealed with a thin coat of clear lacquer for a darker look.
The bookmark is finished. A run of ten takes under an hour once the settings are set.
Variations
Two-tone leatherette. Cut the bookmark in two colours of 1.0 mm leatherette. Place them face-up on parchment, set a household iron to a low wool setting, and press for 8 to 10 seconds. The TPU iron-on adhesive on the back of the leatherette bonds the two pieces together without glue.
Layered acrylic. Cut a base bookmark in solid acrylic and a thinner accent (a quote, an initial, a small shape) in a contrasting acrylic. Bond with 3M tape or a small dot of clear adhesive on the back.
Mixed material. A TruFlat base with a leatherette accent, or an acrylic base with a leatherette tassel-loop reinforcement. Bond with 3M tape.
Magnetic clip. Cut two narrow tabs in matching material, glue a thin disc magnet inside each, and the bookmark folds over the page edge instead of sliding between pages. Best in leatherette for the soft fold.
Bulk sets. Lay six to eight bookmarks on the bed, run one pass, and you have a giftable set in 15 minutes. Personalise each with a different initial.
Troubleshooting
Bookmark is too floppy. Material is too thin, or you used the wrong material for the design. 1.0 mm leatherette is fine on its own only at 30 mm to 40 mm width. For wider bookmarks in leatherette, back it with a stiffer second layer.
Acrylic edges look frosted instead of polished. Cut is incomplete and the laser is dragging through the same line. Increase power, decrease speed, or add air assist if you do not have it on.
Engrave is too light. Speed is too high or power is too low. Drop speed by 25 percent and re-test. Engrave depth scales with the time the beam spends on the surface, not just with power.
Edges are scorched on TruFlat. Speed is too low or power is too high. The laser is dwelling and burning. Increase speed and re-test.
Tassel hole tore through. Hole is too close to the edge. Move the hole at least 8 mm from the top of the bookmark and re-cut.
Frequently asked questions
Q: What is the best material for a personalised bookmark gift? A: 1.0 mm leatherette. It engraves into a clean two-tone effect with no extra material, it survives years of use, and it is the material that customers associate with a finished, gifted product rather than a craft afternoon.
Q: Can I use 3 mm acrylic, or is it too thick for a book? A: 3 mm is at the upper end. It works in hardcovers and thick paperbacks but pushes pages apart in a thin paperback. If most of your books are slim, drop to 1.5 mm or 2 mm acrylic.
Q: How long does a leatherette bookmark last in real use? A: Years. The laser-sealed edges do not fray, the surface holds engraving permanently, and the material does not crease the way card does. The failure point is usually the tassel cord, not the bookmark.
Q: Can I laser-engrave a photo on a bookmark? A: On TruFlat or dark leatherette, yes. Use a dithered or grayscale engrave pass. Acrylic photo engraving works on the back face of clear acrylic but takes more setting tuning than a beginner project warrants.
Q: Do I need to seal a TruFlat bookmark? A: Not strictly. The engineered surface is sealed against light handling. A clear lacquer or wax finish darkens the engrave contrast and protects against pocket grime if the bookmark will be used hard.
Q: What is the smallest profitable bookmark I can sell? A: A 40 by 180 mm leatherette bookmark with a monogram engrave costs under a dollar in materials and laser time, and sells in personalised gift listings for 8 to 15 dollars. Bulk sets of three or four lift the basket value.
What to read next
- Acrylic thickness guide
- PU leatherette thickness guide
- What is TruFlat?
- Shop our bookmark blanks
- Shop our acrylic, leatherette, and TruFlat