


How to laser engrave pencils with a jig (and drumsticks, brushes, knitting needles)
Updated Oct 2026TL;DR: A pencil engraving jig is a flat acrylic plate with slots that hold round items in place while your laser engraves them. Same jig, same workflow, works for pencils, drumsticks, chopsticks, paint brush handles, and knitting needles. Generate the file from our free online tool, cut it in acrylic, load your items, and engrave a full batch in one pass.

What a pencil jig actually is
A pencil engraving jig is a flat panel with long parallel slots cut through it. You drop a round item (pencil, brush handle, drumstick, knitting needle) into a slot and it sits flat with the side you want to engrave facing up. The jig keeps every item at the same height and on the same axis, so your text and graphics land in the same spot on every piece.
That is the whole trick. No rotary axis, no clamps, no rolling. The jig holds the items still while the laser fires.
A typical jig fits between five and twelve slots, depending on the length of the item and the size of your laser bed. Cut once, use forever.
What you can engrave with one jig
The same generator produces a jig sized for whichever item you choose. Most makers cut one for pencils, then realise the workflow is identical for everything else with a round handle.

Common items that fit a cylinder jig:
- Pencils. Standard hexagonal or round, 7 to 8 mm.
- Drumsticks. 5A, 5B, 7A, and similar, usually 14 to 16 mm at the grip.
- Chopsticks. Both round and square-tapered.
- Paint brush handles. Watercolour brushes through to wide flats.
- Knitting needles. Bamboo or birch, 4 mm up to chunky 12 mm.
- Crochet hooks, calligraphy pens, makeup brushes, dowels, plant labels, garden stakes.
If it is round, mostly straight, and shorter than your laser bed, a jig can hold it.
What you need
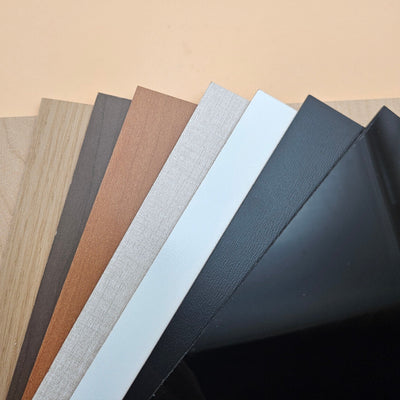
- A sheet of acrylic. 3 mm is the standard for jigs. Cast acrylic gives a cleaner cut and a flatter jig. Any colour works, but a light colour makes alignment easier under the laser.
- A laser cutter that can both cut the jig and engrave your items. CO2, diode, or fibre. The same jig works on all three.
- The items you want to engrave. Start with a batch of cheap pencils for your first run.
- The free pencil engraving jig generator on MyLaserTools.
- Painters tape or low-tack masking tape, optional. Useful if your items are very light and want to drift in the slot.
Step by step
Step 1: Measure your items.
Grab a calliper and measure the diameter of the item you want to engrave at the widest point along the length you plan to engrave. Pencils sit around 7 mm. Bamboo knitting needles vary from 4 mm to 12 mm depending on the gauge. Drumsticks are usually 14 to 16 mm. Write the number down. If you do not have a calliper, an old pencil is 7 mm and that is close enough for a first jig.
Also measure the length you want to engrave on, not the full length of the item. You need the jig to be slightly shorter than the engraving area so the item rests on the slot edges with the engraving zone exposed.
Step 2: Generate your jig file.
Open the free pencil engraving jig generator. At the top, tap the tab for the type of item you have: Pencil, Drumstick, Chopstick, or Knitting Needle. Each tab loads sensible presets so you do not have to start from scratch.

In the Set Dimensions and Count section, type the diameter you measured. The slot width updates automatically with a small clearance baked in so the item drops in without rattling. Set the slot length to roughly the engraving length of your item.
For the slot count you have two choices:
- Custom Count. Pick the exact number of slots, useful if you only have eight items to engrave today.
- Fill Sheet. The generator auto-fills your laser bed with as many slots as will fit. Good for batch runs.
The 3D preview on the right updates as you change values. Rotate it with the mouse to confirm the layout matches what is in your head.
Step 3: Add your text and symbols (optional).
If every item in the batch needs different text (names, dates, gift tags), type one entry per line in the Engrave Text field. The generator paints the text directly into the file at the correct position above each slot, ready to engrave in the same pass as the jig itself.
Long names auto-shrink to fit the available space. You can add a small symbol (star, heart, leaf, etc.) beside each name and choose its position. Pick Engrave & Print mode for filled text or Score mode if you want single-line laser fonts that engrave faster.
If you want to engrave a logo or pattern that the generator does not handle, skip this step. You will add the artwork in your laser software once the jig is on the bed.
Step 4: Download the SVG.
Click Download SVG. The file contains three layers in one document:
- Cut. The outer outline of the jig.
- Slots Cut. The slots that hold your items.
- Engrave. The text and symbols that will sit above each slot.
Save the file somewhere you will find it again. Name it after the item, the diameter, and the slot count: pencil-jig-7mm-5slots.svg. You will reuse this file every time you engrave the same item.
Step 5: Cut the jig.
Open the SVG in your laser software (LightBurn, xTool, RDWorks, Glowforge, whatever you use). Assign laser operations:
- Cut layer: cut through your acrylic. Standard cast acrylic cut settings for your machine.
- Slots Cut layer: also cut through. Same settings as the outer Cut.
- Engrave layer: disable for now. You only want the jig outline and slots on this pass. The Engrave layer is for engraving items, not the jig itself.
Run the cut. Weed the slots out of the acrylic if any small bridges remain. You now have a reusable jig.
Step 6: Load your items.
Place the jig on the laser bed, dead flat. Drop each item into a slot. They should sit with the side you want to engrave facing up. For pencils with a flat side or a logo, rotate each one so the blank side is up.
If items are very light and slide around (small knitting needles for example), tape one end down with painters tape. Drumsticks are heavy enough that they sit still on their own.

Focus the laser on the top surface of the item, not on the surface of the jig. The two heights are different by half the item diameter, and engraving out of focus gives a faint, blurry mark.
Step 7: Run the engrave.
In your laser software, disable the Cut and Slots Cut layers. Only the Engrave layer should be active. Run the file. The laser visits each slot in turn and engraves the text or graphic you set up in step 3.

For per-item custom designs you skipped in step 3, drop your artwork into the file at the correct slot positions before running. Or run the engrave one item at a time, swapping the file between runs. Slower, but every item can be different.
Step 8: Rotate or swap and repeat.
If you only need one face engraved per item, the batch is done. Tip the jig, items roll out, load the next batch.
For two-sided engraving, rotate each item 180 degrees in its slot and run the engrave a second time. Most jigs are symmetrical front to back, so the second face lands in the same position as the first.
Tips and gotchas
Cut the jig in a colour that contrasts with your items. A white jig with black drumsticks, or a black jig with bare wood, makes it trivial to spot a misaligned item before you press start. Clear acrylic looks great but is harder to read when an item is sitting off-axis.
Hexagonal pencils want to roll. Standard yellow school pencils have six flat sides. They sit happily in a slot with one flat facing up. If they rotate during the engrave, glue a thin strip of EVA foam to the underside of each slot for friction.
Air assist matters more than you think. Engraving round items in a slotted jig means smoke and resin pool under the item where the slot is. Crank your air assist a notch higher than your usual flat-stock setting to keep the soot from depositing on the engrave.
Fume extraction is non-negotiable. Burning painted wood, and bamboo all produce fumes you should not be breathing. This applies to every laser cutting and engraving job, not just jig work. Vent outside, run an inline fan, and use a proper enclosed extractor.
Pencils flex, drumsticks do not. Long thin items with a slight bow will lift off the slot at the centre. Hold them down with a small piece of tape near the engrave area. Drumsticks, dowels, and thicker knitting needles sit naturally flat.
What settings should I use?
The right settings depend entirely on your machine and the material. Bamboo, painted wood, plastic-coated pencils, and metal-ferrule brush handles all want different power and speed. The honest answer is: do a test grid.
Cut a small square of the item material (or use a single sacrificial pencil), engrave a test pattern at varying power and speed (LightBurn has a Material Test built in for this), and pick the cell with the cleanest darkest mark. Save the settings under a meaningful name like "PencilEngrave-Bamboo-Diode10W". Next time, no more test grid.
Rough starting points for common items:
- Pencils (painted wood): moderate speed, low to moderate power. Engrave at 1 to 2 passes.
- Drumsticks (lacquered hickory): higher power than pencils because the lacquer is thicker.
- Bamboo knitting needles: low power, high speed. Bamboo burns easily and high power blackens the entire engrave area.
- Paint brush handles (lacquered birch): similar to drumsticks but expect more variability from brush to brush.
Why a jig beats engraving freehand
Without a jig, you have to align each item by hand under the laser, eyeball the engrave position, hold the item still, and repeat the alignment for every piece. With a jig, you align once (when you place the jig on the bed) and every item is automatically in position.
For a single one-off item, freehand is fine. For anything more than three pieces, a jig pays for itself the first run. The acrylic costs a few dollars; the time saving on a batch of 24 wedding favour pencils is hours.
Frequently asked questions
Q: Do I need a rotary axis to engrave round items? A: No. Rotary axes are for engraving around the full circumference of a round item (like a wine glass or a tumbler). For engraving one side of a pencil, drumstick, or brush handle, a flat slotted jig is faster, simpler, and works on any laser.
Q: What is the smallest item this jig can hold? A: The generator lets you go down to about 3 mm diameter, suitable for fine knitting needles or thin dowels. Below 3 mm the kerf of the slot starts to dominate and the item tilts in the slot.
Q: Can I use the same jig for UV printing? A: Yes. The jig is dual-purpose. Download the 300 DPI PNG output from the generator and load it into your UV printer software. Place items in the same slots and print in a single pass.
Q: Does it work on a diode laser? A: Yes. The jig is just acrylic with slots; it does not care what laser cuts it or what laser engraves the items. CO2, diode, and fibre lasers all work. Pick acrylic colour with care for diode lasers, since clear acrylic does not absorb blue light. Use a coloured (especially black or dark) acrylic for the jig itself if cutting with a diode.
Q: How many times can I reuse the jig? A: Indefinitely, as long as the engrave layer of the SVG was disabled when you cut the jig. The jig acrylic does not touch the laser beam during the engrave run, so it does not degrade.
Q: My text engraved off-centre on every pencil. What did I do wrong? A: Two common causes. Either your laser bed origin and the SVG origin do not match (rerun an axis test in your software), or the focus is on the jig surface rather than the top of the item. Re-focus on the top of the item and try again.
Q: Can I sell engraved pencils I made this way? A: Yes. The jig generator and downloaded SVG are free to use commercially. Personalised pencils, drumsticks, and brushes are a strong gift and small-business product line.
What to read next
- How to laser cut cast acrylic cleanly
- Cast vs extruded acrylic for laser
- Materials you should never put in a laser
- Shop our cast acrylic sheets
LightBurn links in this article are affiliate links. If you buy through them, YXE Creations Craft Hub earns a commission at no extra cost to you.